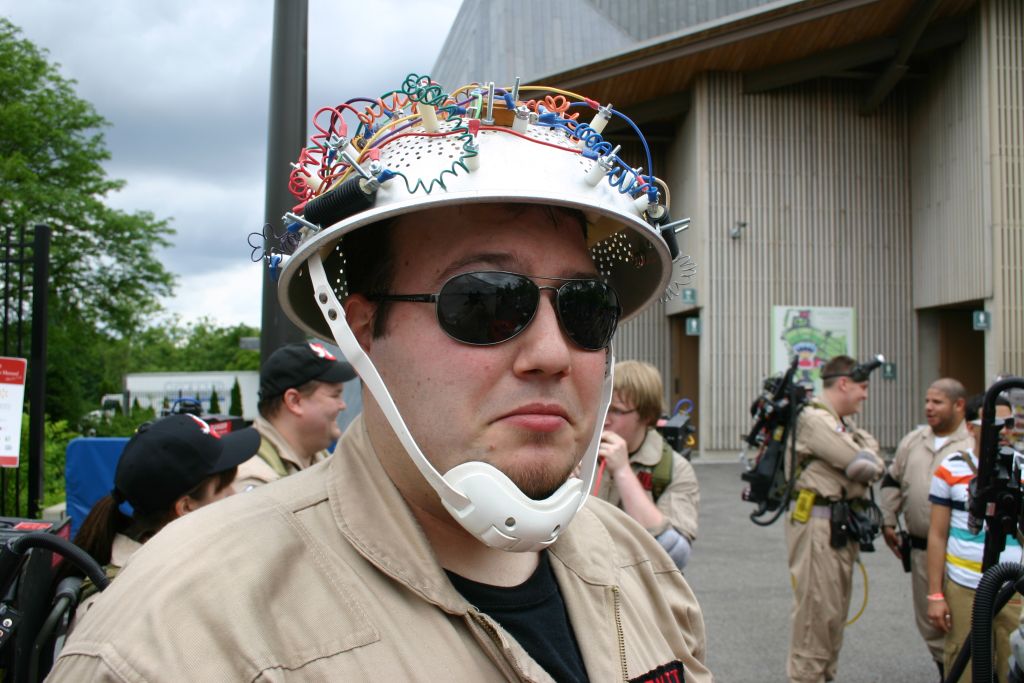
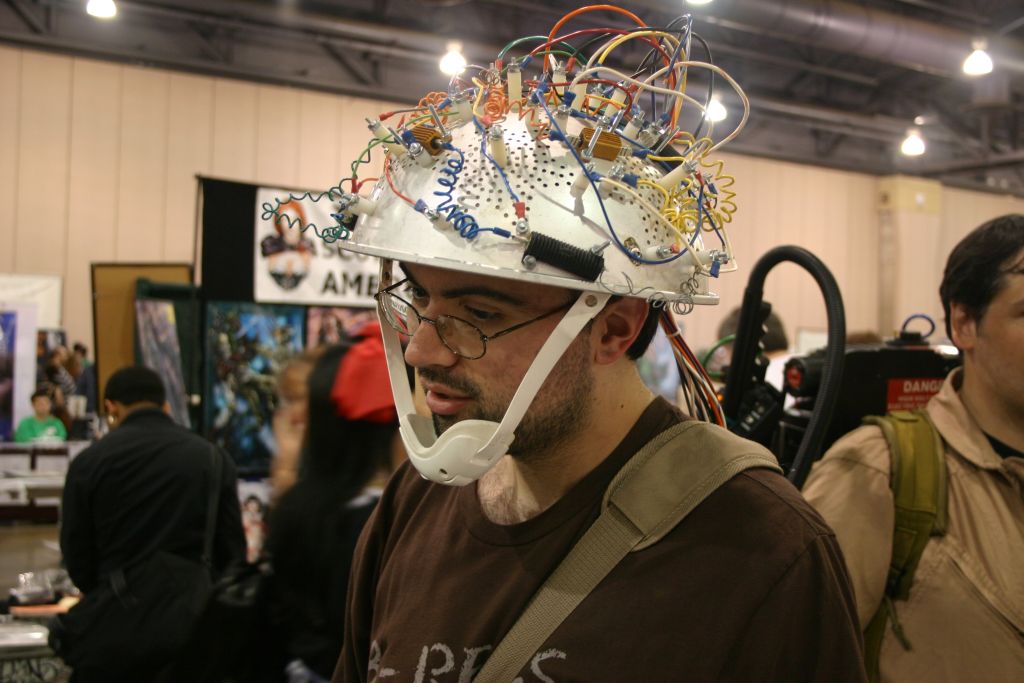
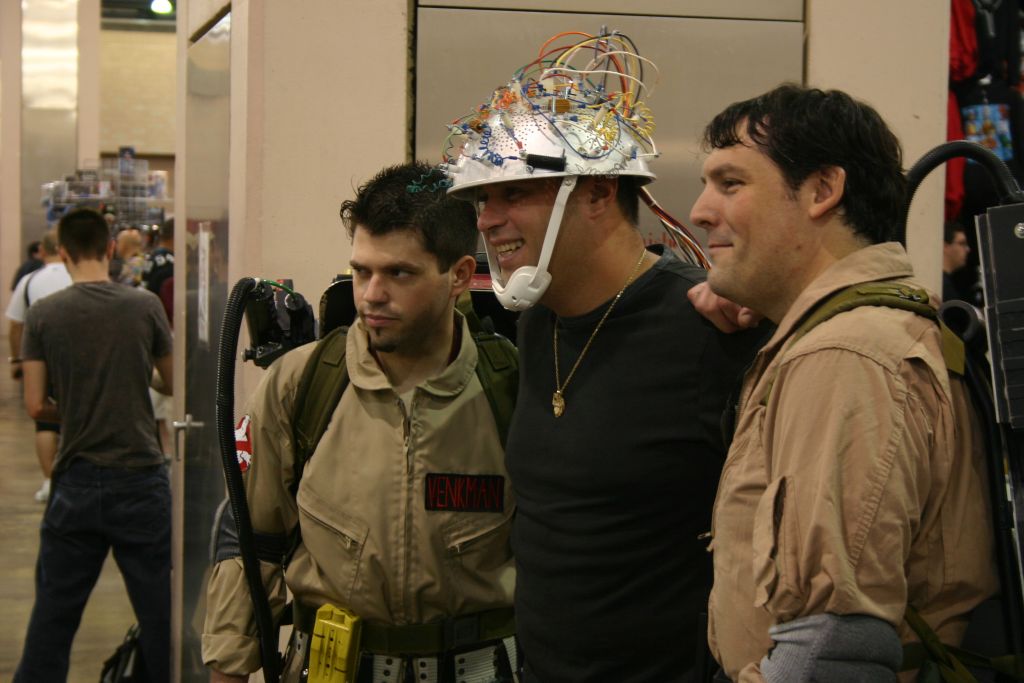
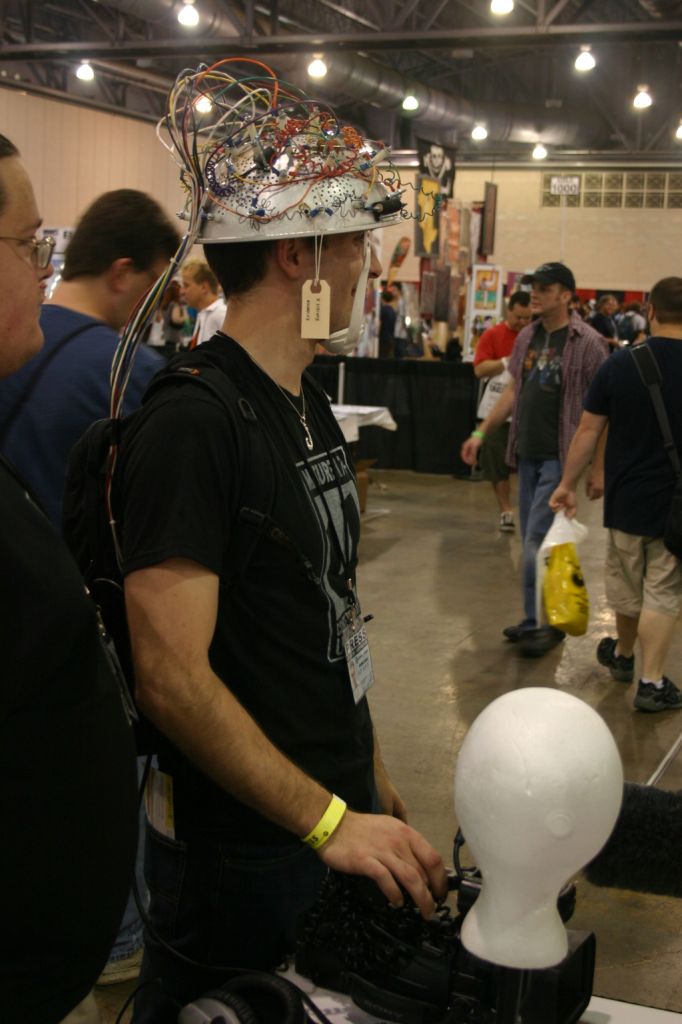
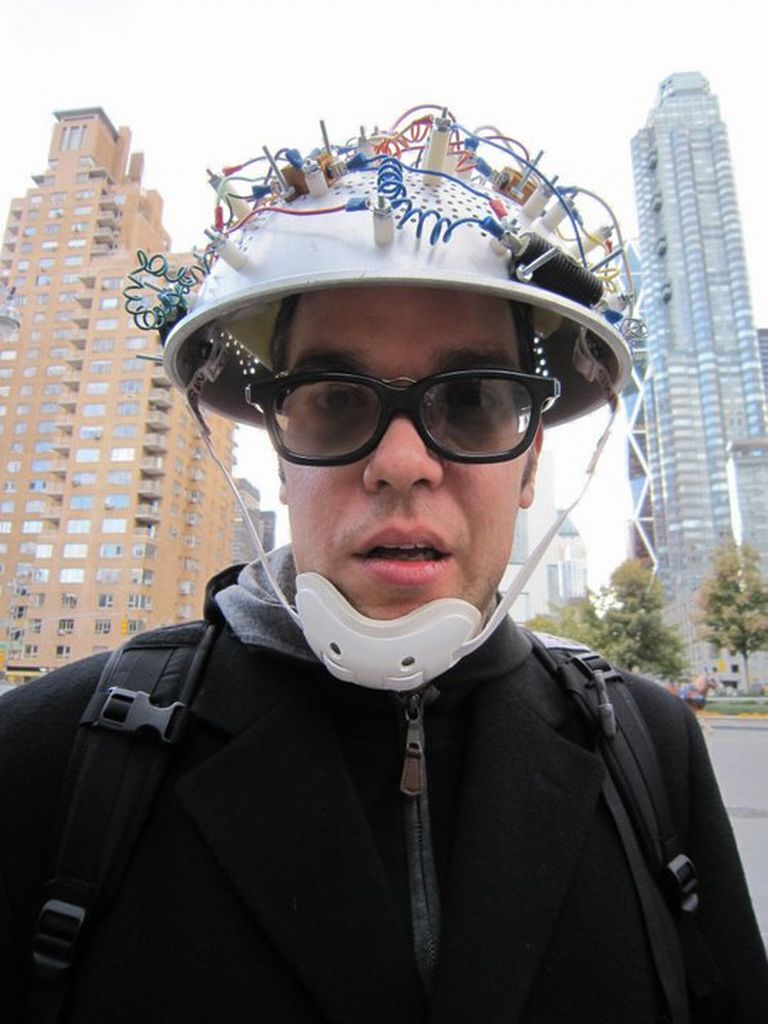
Keymaster Colander Helmet
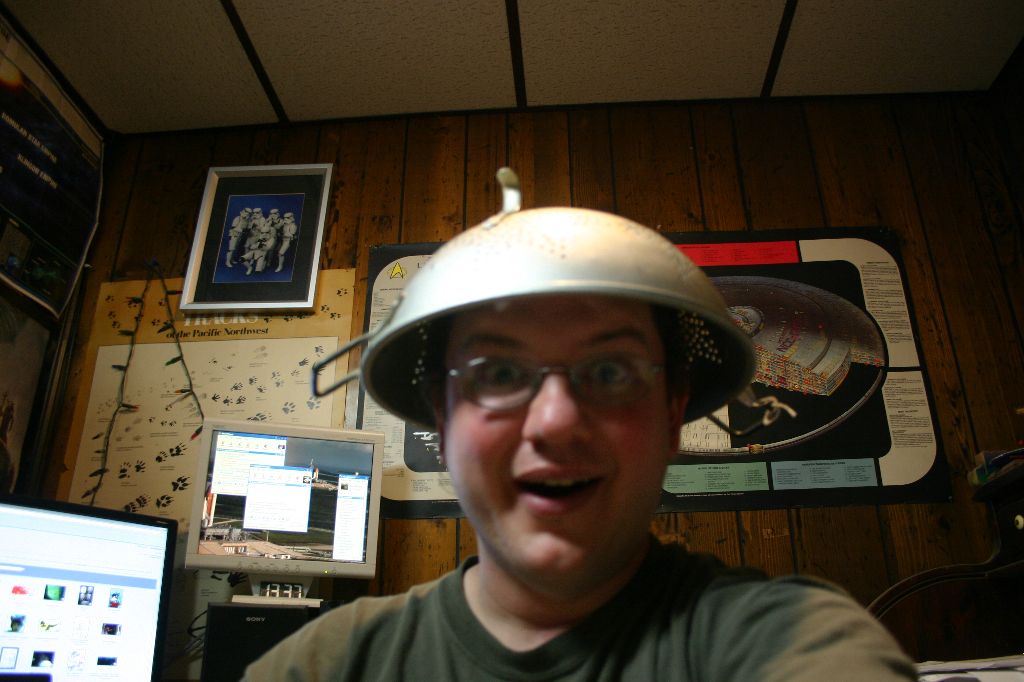
This project came about after I found a colander at a thrift store. I'd been keeping an eye out for the correct vintage colander for a while but finding one is pure luck. Technically the one I found is a size too large, shouldn't have the handles or feet and the star pattern should be rotated but for $4 I'd live with it.
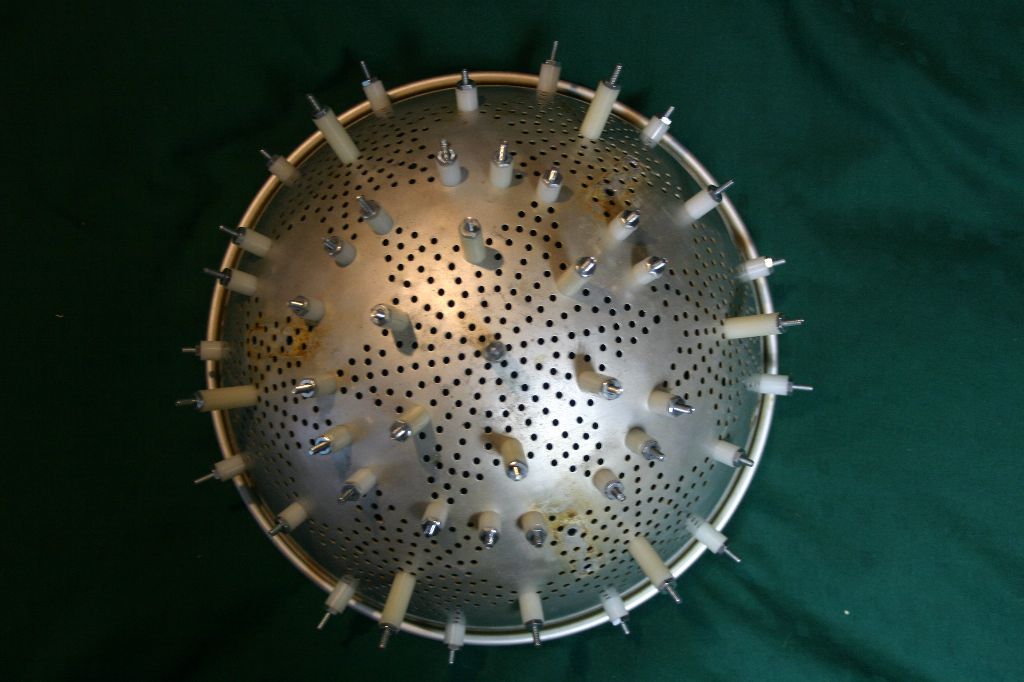
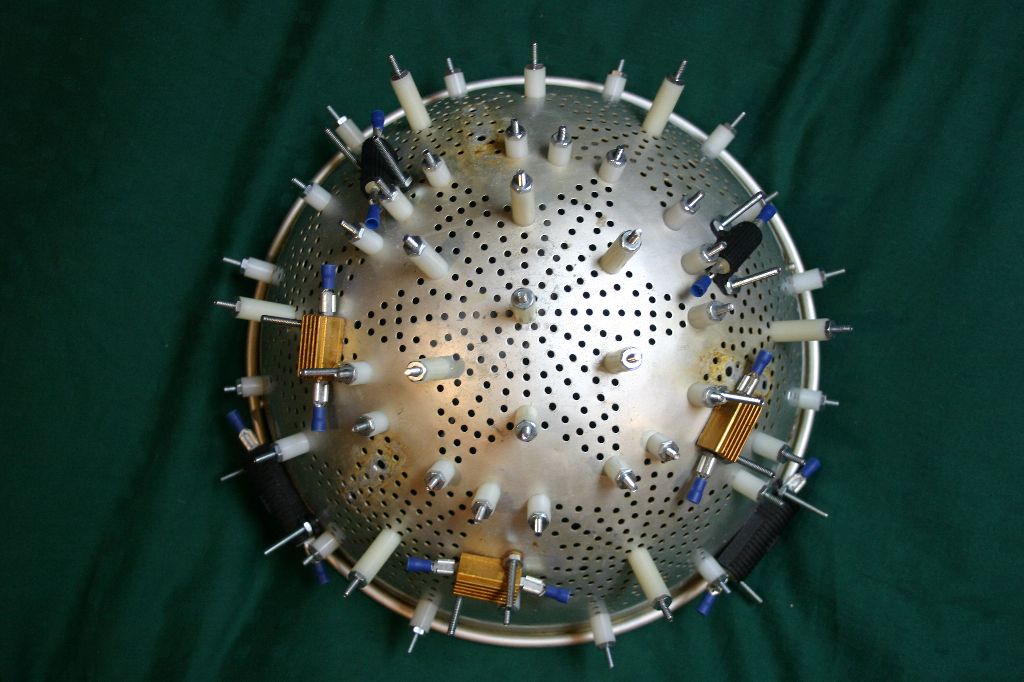
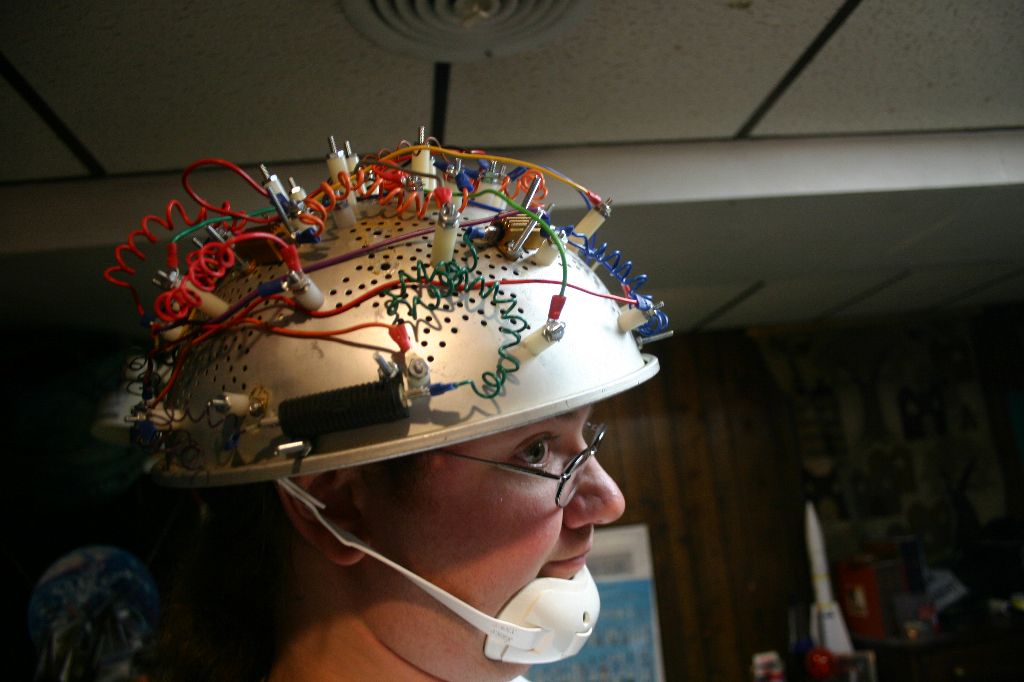
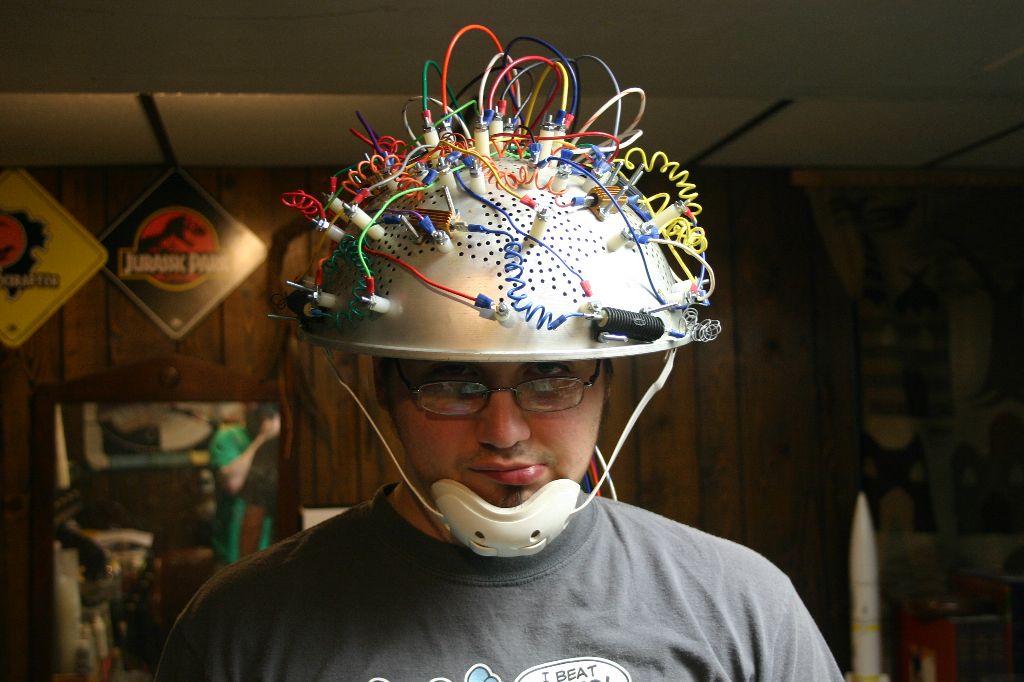
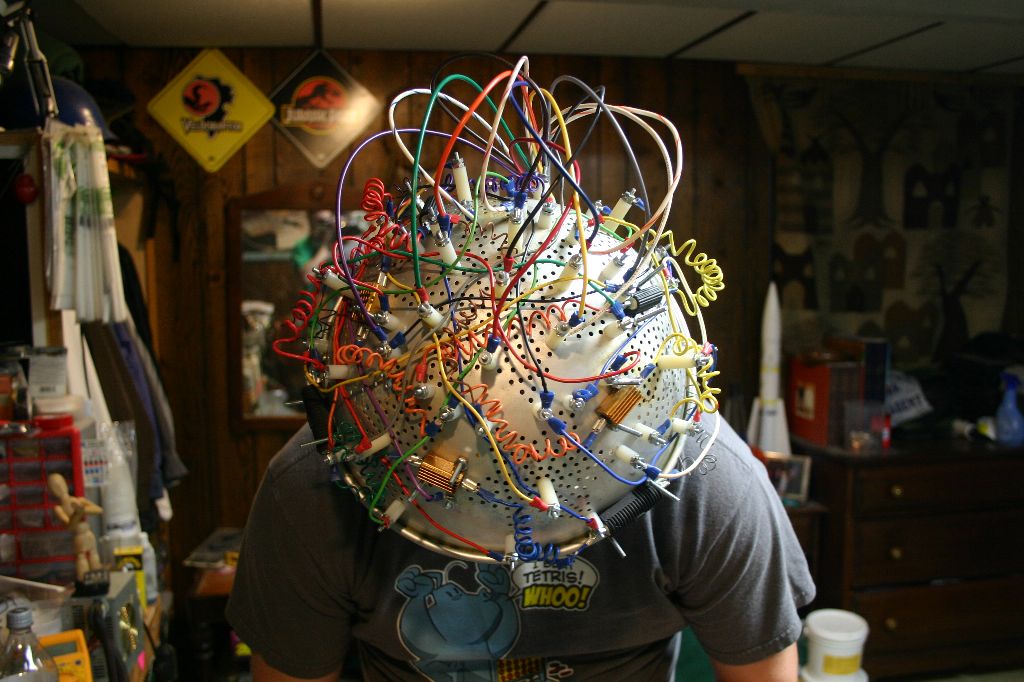
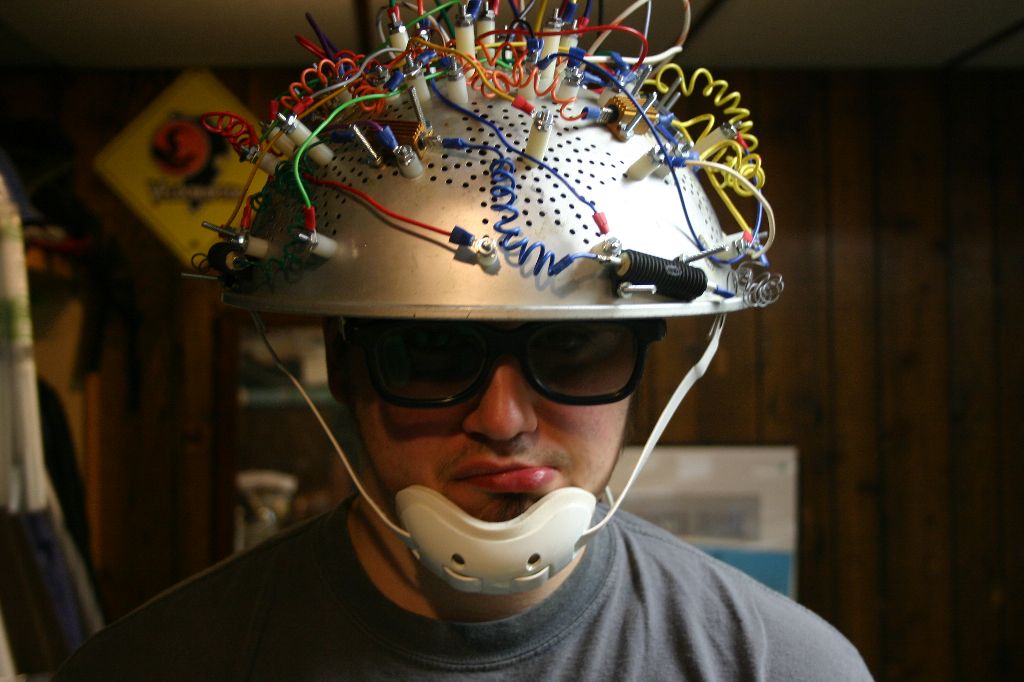
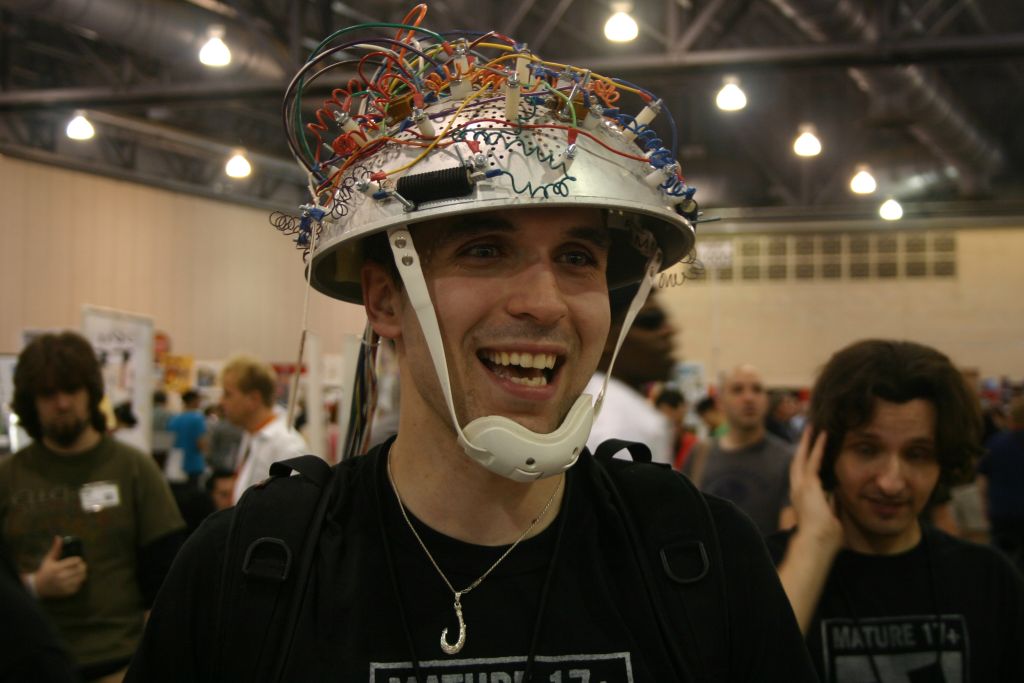
I cut off the handles and feet with a dremel then started staring at screencaps to figure out how the actual prop was put together. There are three different types of ceramic standoffs used. I did a search on google trying to find the correct ones but none of them ever turned up so I wound up going with nylon bushings of various sizes. Each bushing was attached with a bolt long enough to leave about a half inch sticking out of the top of it and a nut. I used 1" bushings at the center of each star and at the corners of the top star. For the lower stars I alternated 1/2" and 5/8" bushings at the points of each star. I couldn't follow the exact pattern of the movie prop due to the differences in the colanders but I think it worked out.
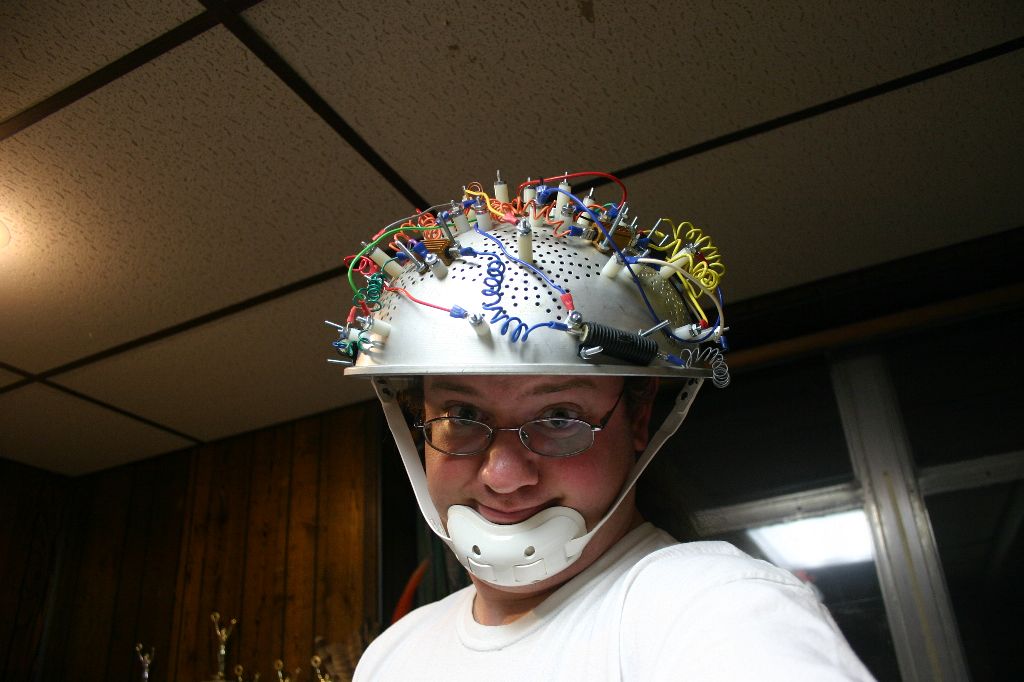
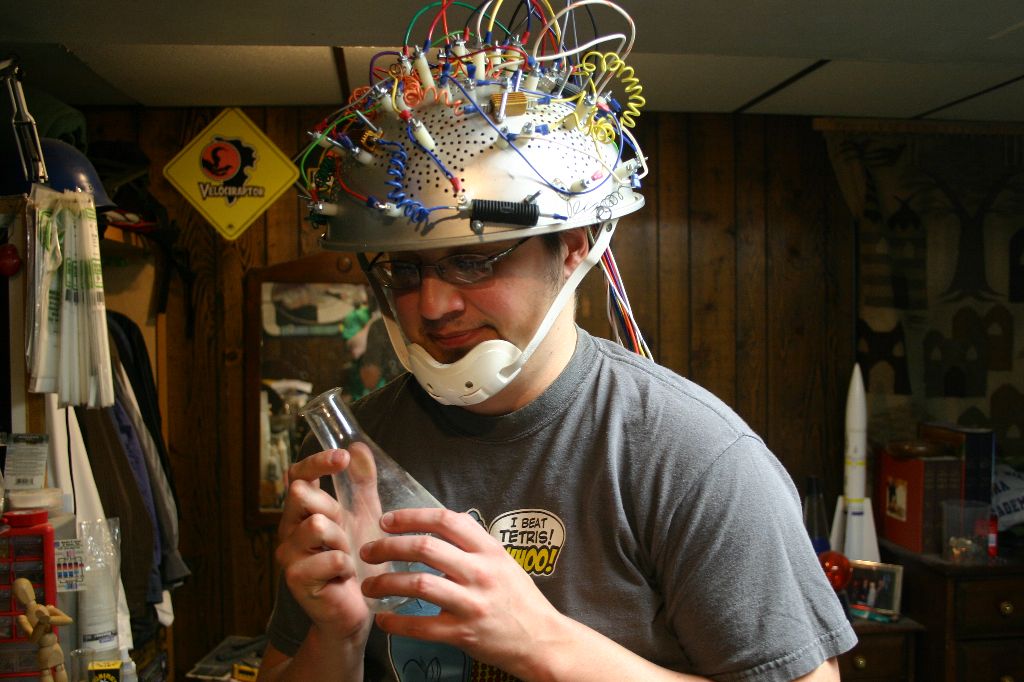
With the standoffs on I could work out a front and back and attach the chin strap. The original used a chinstrap from a Pro-Tec brand sports helmet. The brand still exists but the styles have changed since the 80s and finding what the original helmet was is too much work. Rumor has it that it was a wrestling helmet but I couldn't find any proof. A white chin cup is harder to find than you think, especially if you don't want to order one of the internet. Eventually I found one that would work in the football section of a local sporting goods store.

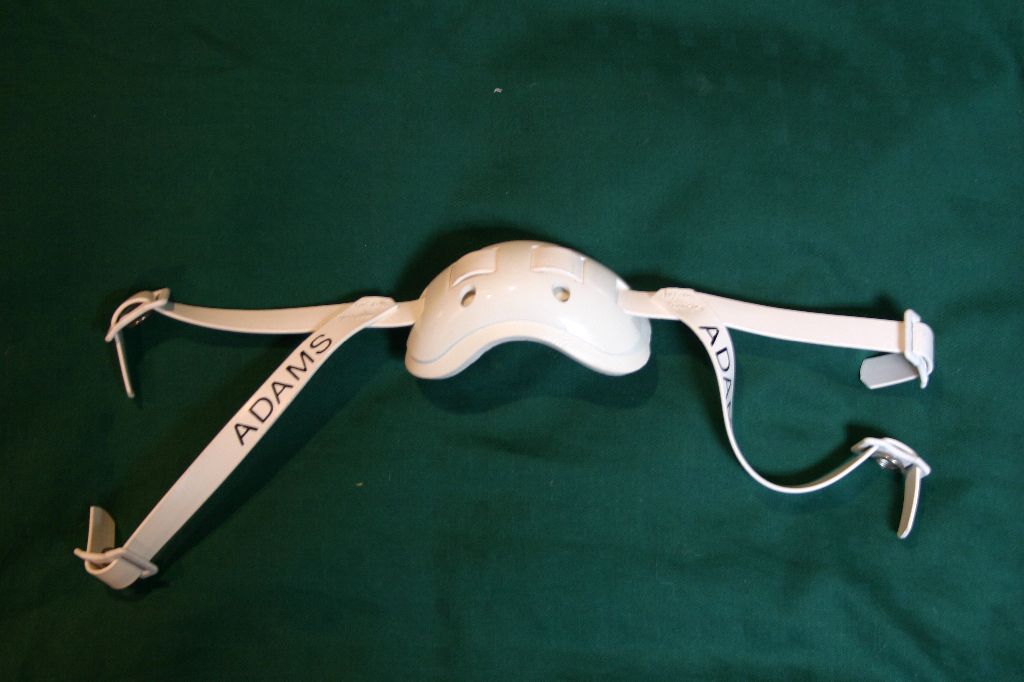
I undid the stitching on the strap and then riveted the parts back together into a single strap. Snaps were riveted into the helmet.
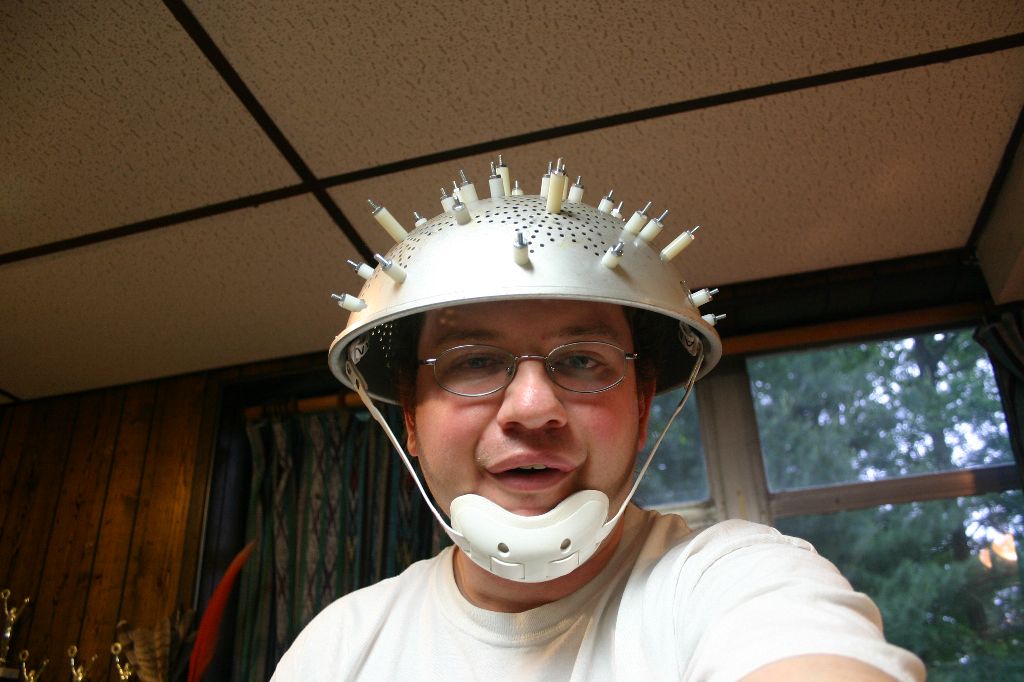
There are a bunch of Dale resistors added to the helmet, all of which are used on other GB props. There's one of each type of the large Dale 50ohm resistors, three of the gold 25ohms used on the traps and at least two of the small black 25ohms. I spotted what may be a 3rd black 25ohm on the back of helmet but by the time I did I didn't want to bother getting another one.
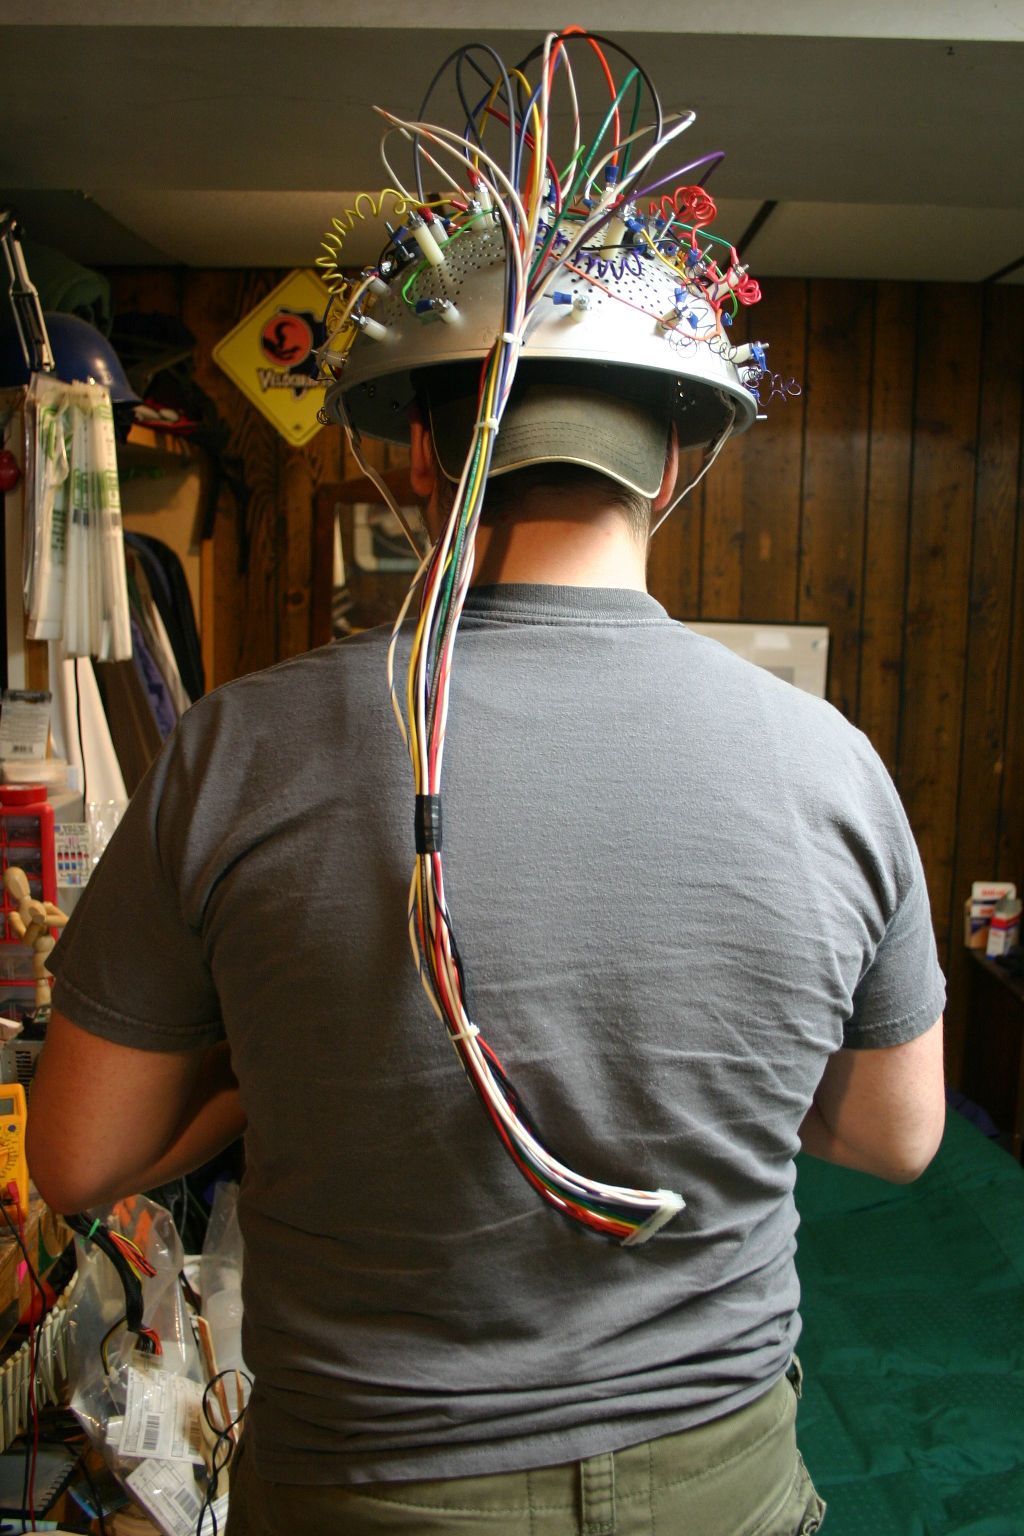
Most of the coiled wires on the helmet connect the resistors together. A computer power supply provided most of the wire and blue crimp spade connectors attached them together.
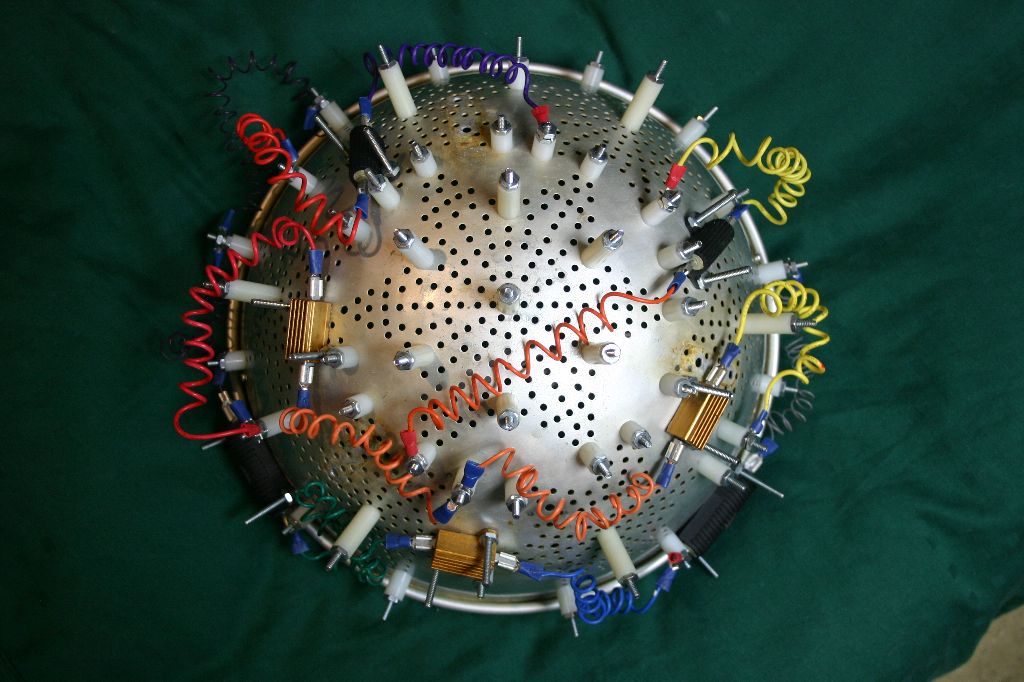
The rest of the helmet wires just connect between various standoffs. I tried to match up the colors and locations as much as possible.
The ribbon cable off the back of the helmet was a problem as no one sells rainbow cable at that gauge in small quantities. Fortunately I had extra parts for a GB1 pack cable sitting around. In the movie they used a really long cable to connect the helmet to some equipment. Since my version was intended to be more mobile I took the molex connector off the computer power supply that I had been getting the wires from and glued the wire in in-order to simulate the ribbon pattern. Some upholstery foam glued in for padding and some zip ties to hold the cable in shape at the top and the project was done.
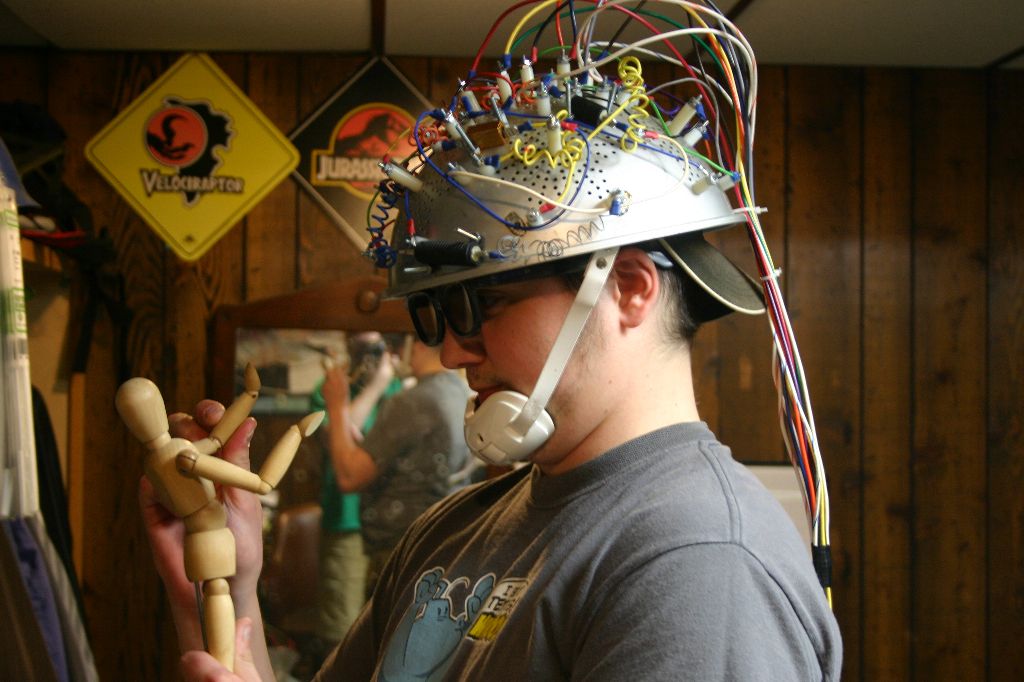
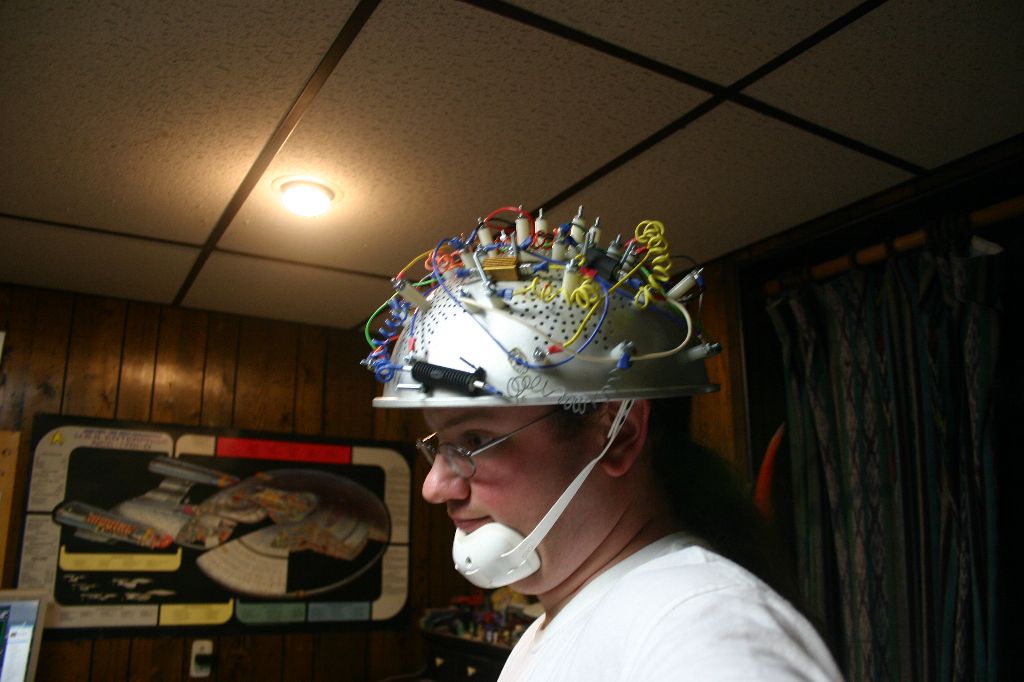
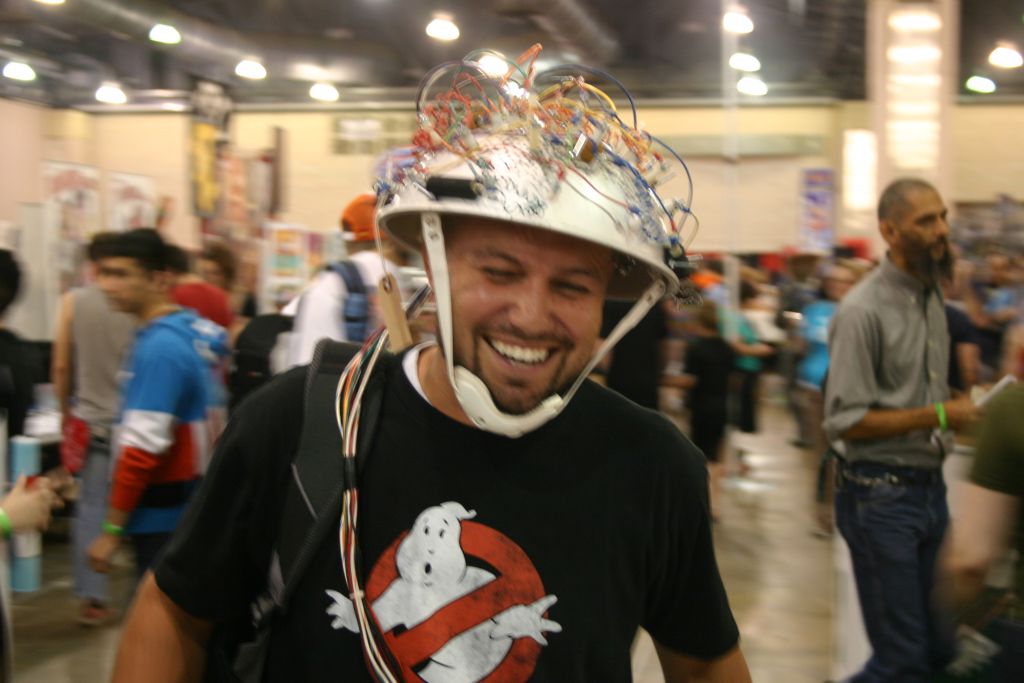
One positive side effect I've found is it's impossible NOT to look like an idiot while wearing the helmet so you get into character very quickly.
Tweet
