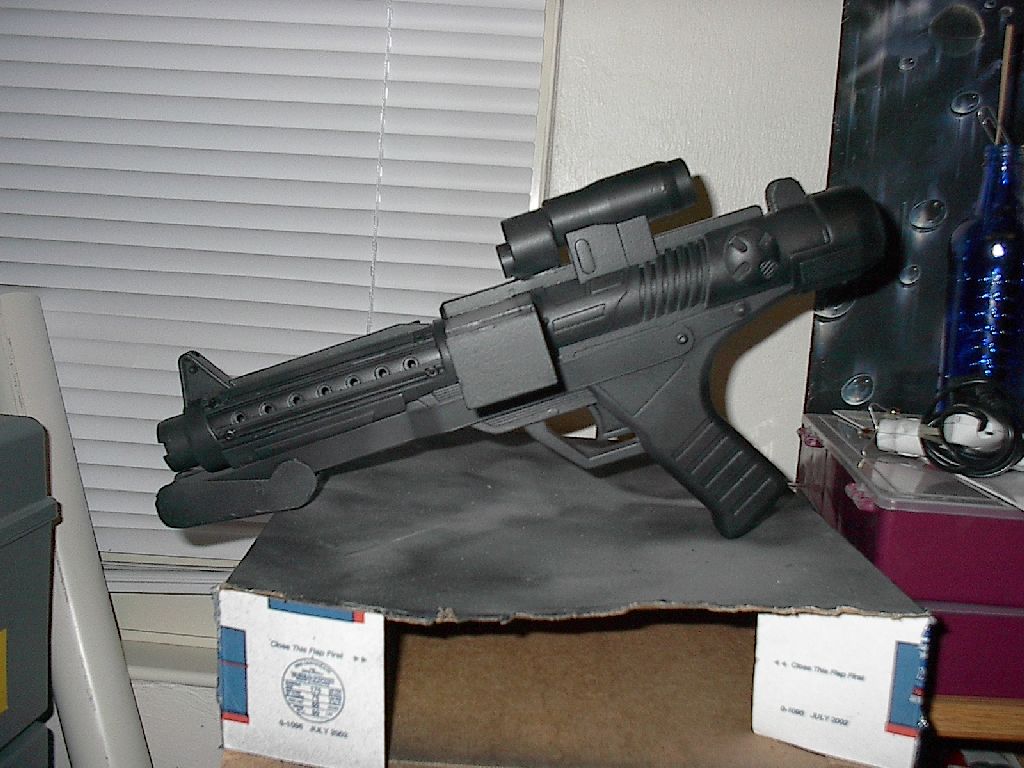
Stormtrooper Blaster (Mark 1)
UpdateThis was my first attempt. I have since made a second, more accurate blaster the tutorial for which can be found here
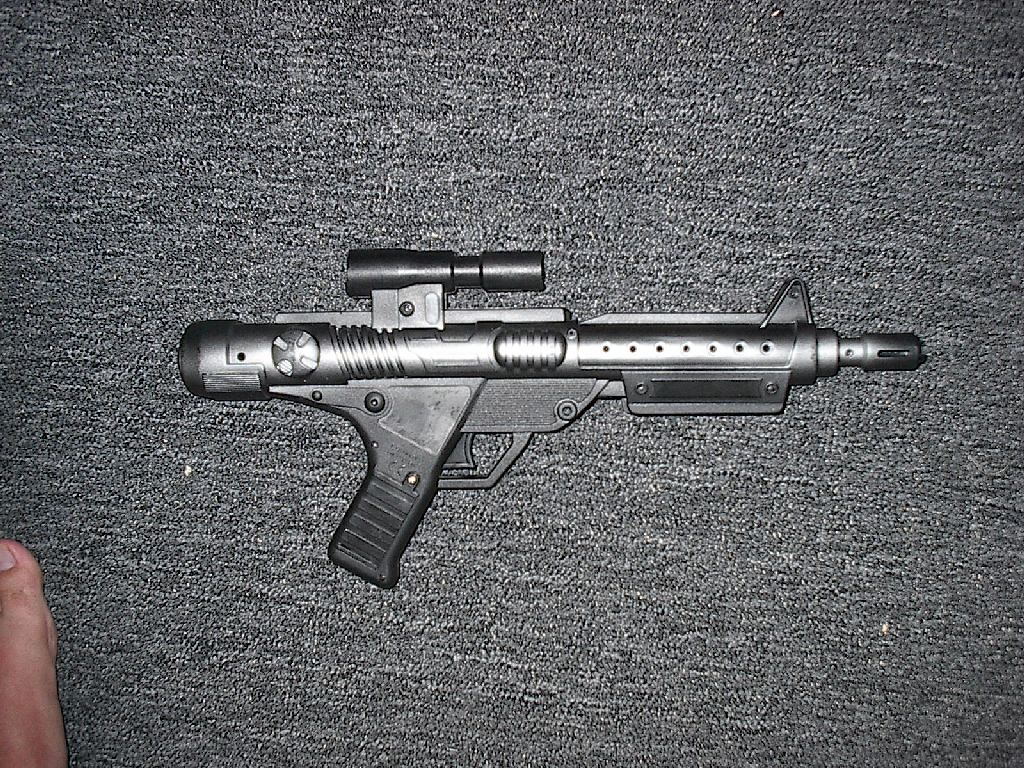
After attending Wizard World East 2003 with my metal blaster (Studiocreation homebuilt version), I realized I needed something lighter for carrying around conventions. I didn't want to pay the high prices on ebay at the time for a Kenner blaster so I got one of the knock-offs that had been around for a while from KB Toys. Unfortunately these looked even less like a Sterling SMG than the Kenner ones, so some modifications were in order. Here is how I went about modifying my gun to make it more like an E-11.

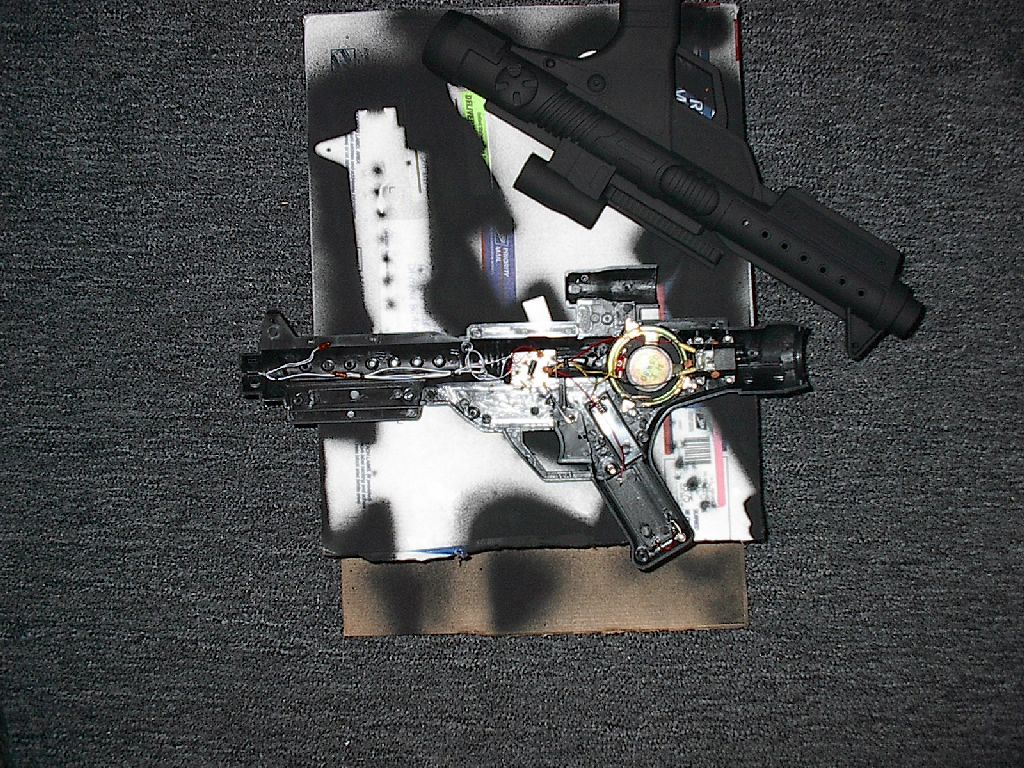
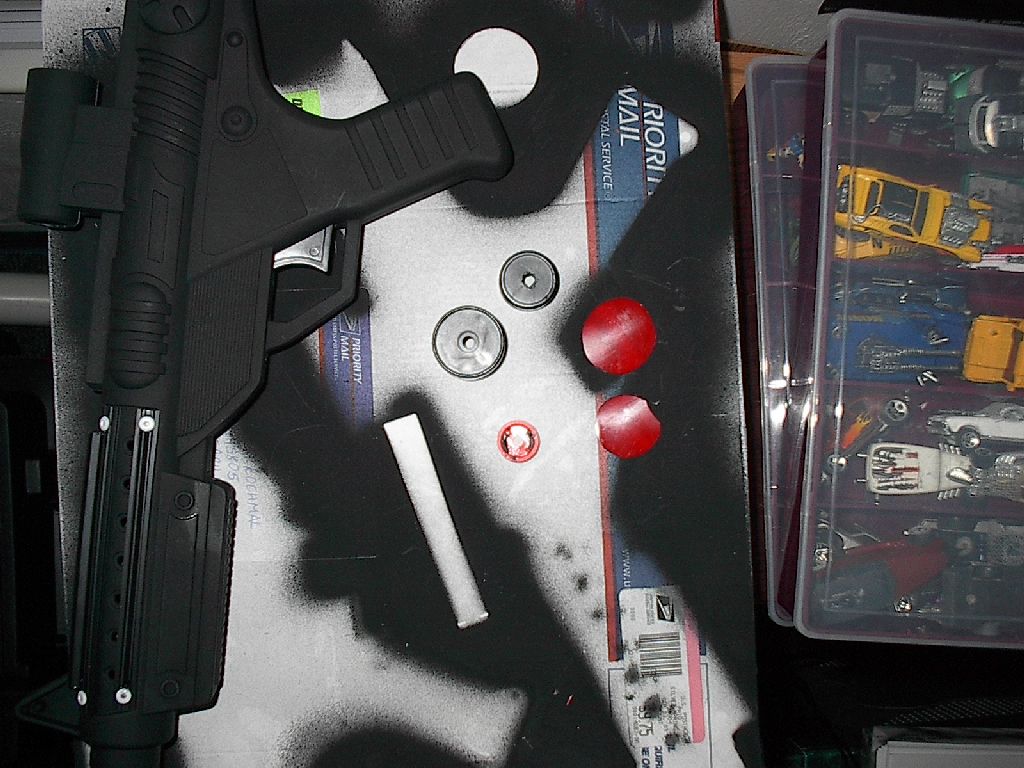
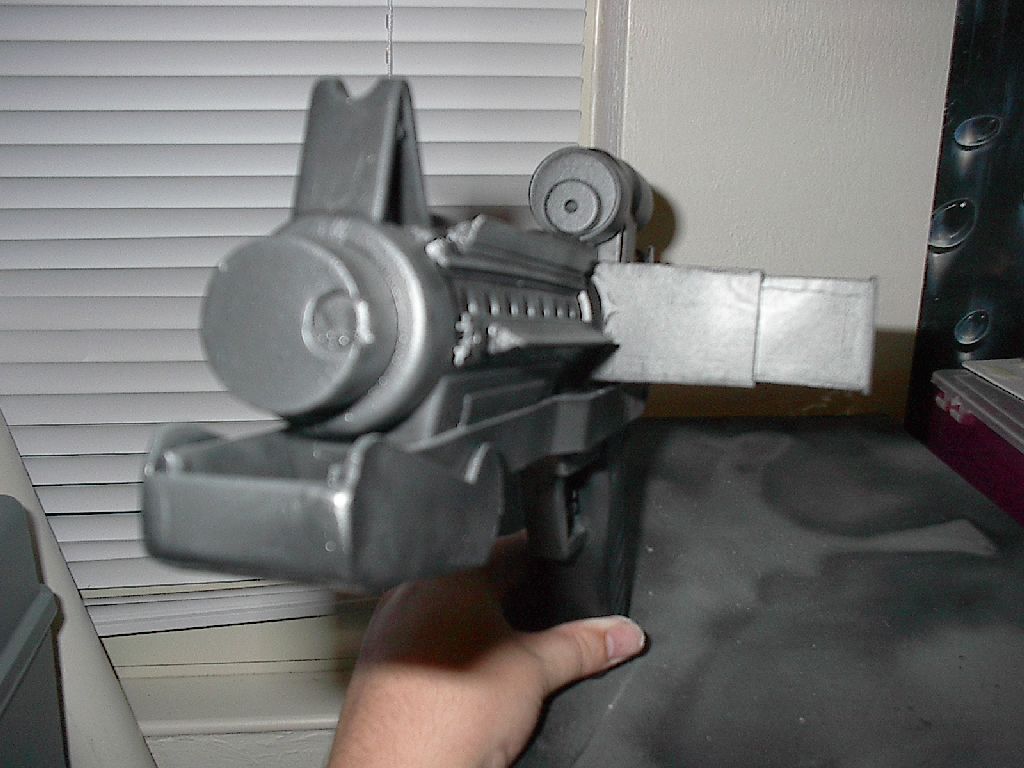
First thing you need to do is trim off some of the parts from the gun. The picture below shows the gun after I used the jeweler's saw to cut off the front and back of the scope, as well as the orange tip of the muzzle.
You'll want to be careful when cutting these parts off as you'll be using them again later. Try to cut them as flush as possible. After you have them cut off, take a screwdriver and open the gun up. At this point you need to decided whether you want to keep the electronics inside; I left them in.
In the future I plan to make another of these with a laser pointer modification in it (see Blaster Mark II). If you're keeping the electronics you'll need to move the light bulb in the end of the barrel farther into the body as you will be removing the barrel. Once you've done that, cut off the barrel and the rest of the front half of the scope so the remaining scope is flush with its mount.

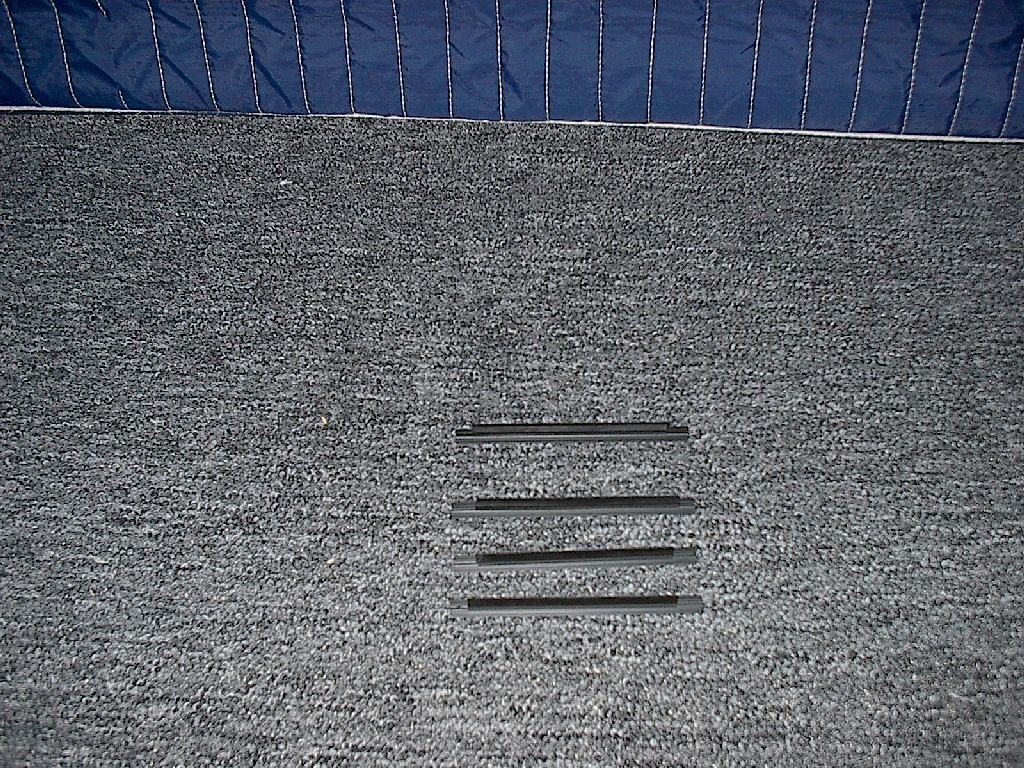
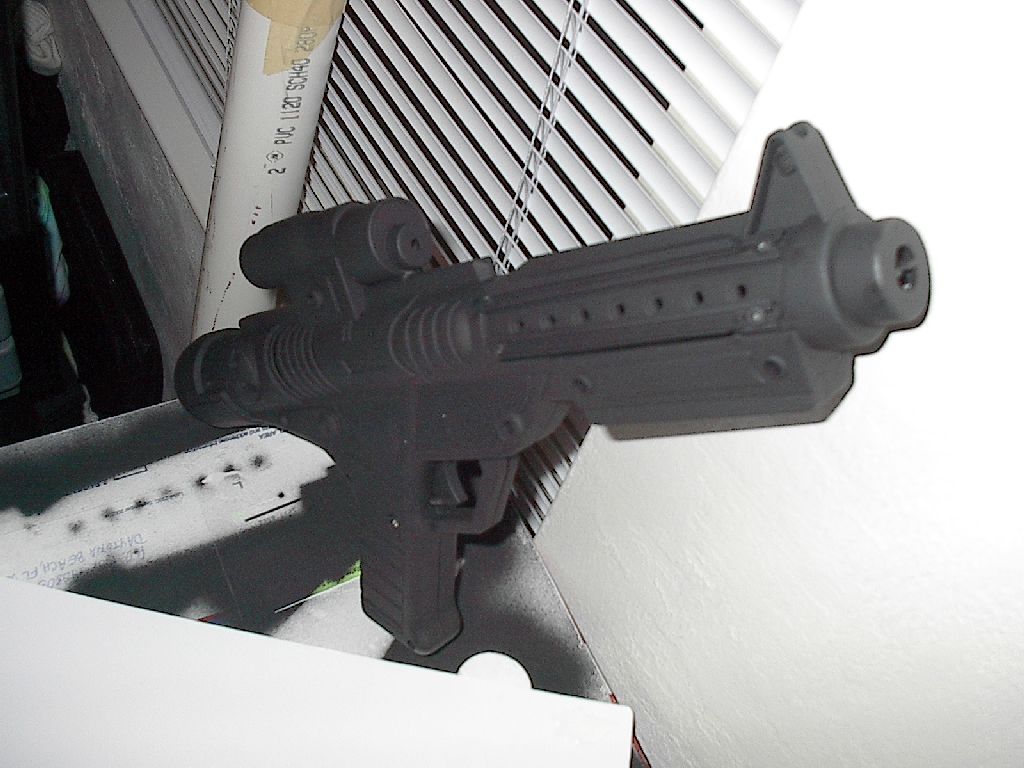
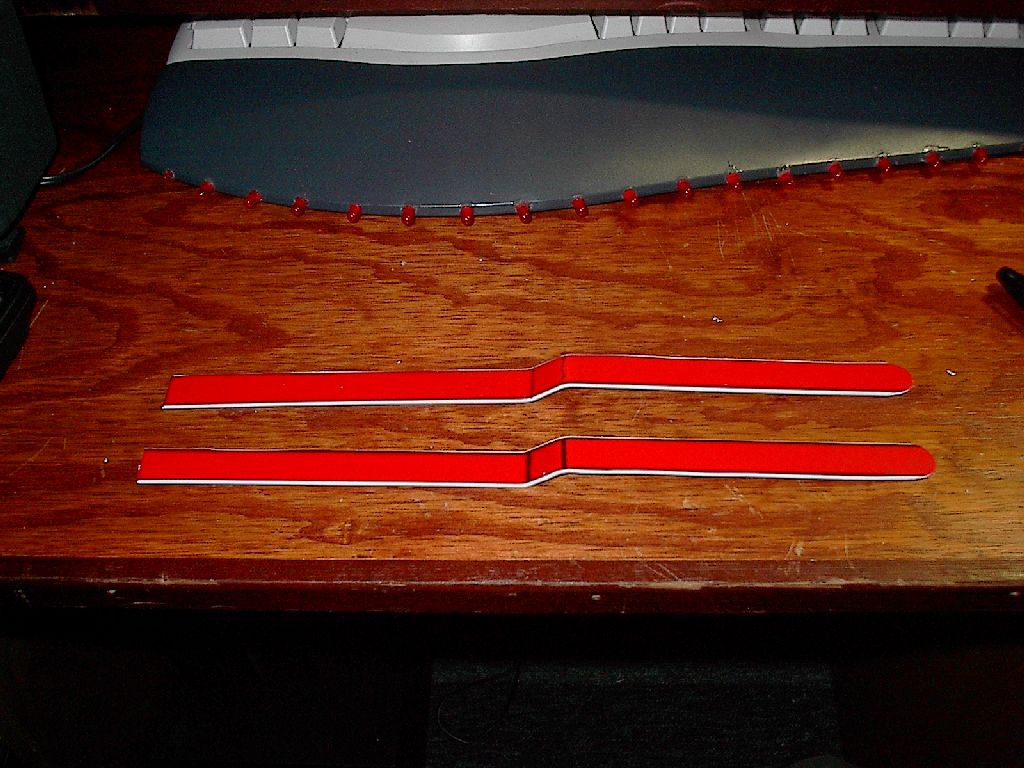
At this point I gave the gun an initial coat of black to better visualize the design. While the paint was drying I got the wiper blades ready. You don't need very long blades and the shape doesn't really matter so just get the cheapest you can find. I put a pair of blades on each side of the barrel. One set is flush with the base of the recessed area, the other is halfway between them and the top. Cut the blades to the necessary lengths with the jewelers saw but trim an extra inch off of the rubber part. If you don't have a saw a pair of scissors or snips will work too. This will give you space to drill holes to attach the blades to the gun. Drill a 1/8ths inch hole on each side of the blade rubber and a corresponding hole on the gun barrel. Using a rivet gun and 1/8th inch rivets (I'd recommend the long ones over the shorter), secure the rails to the gun. If the rails are a bit loose, a little epoxy around the rivets can help.
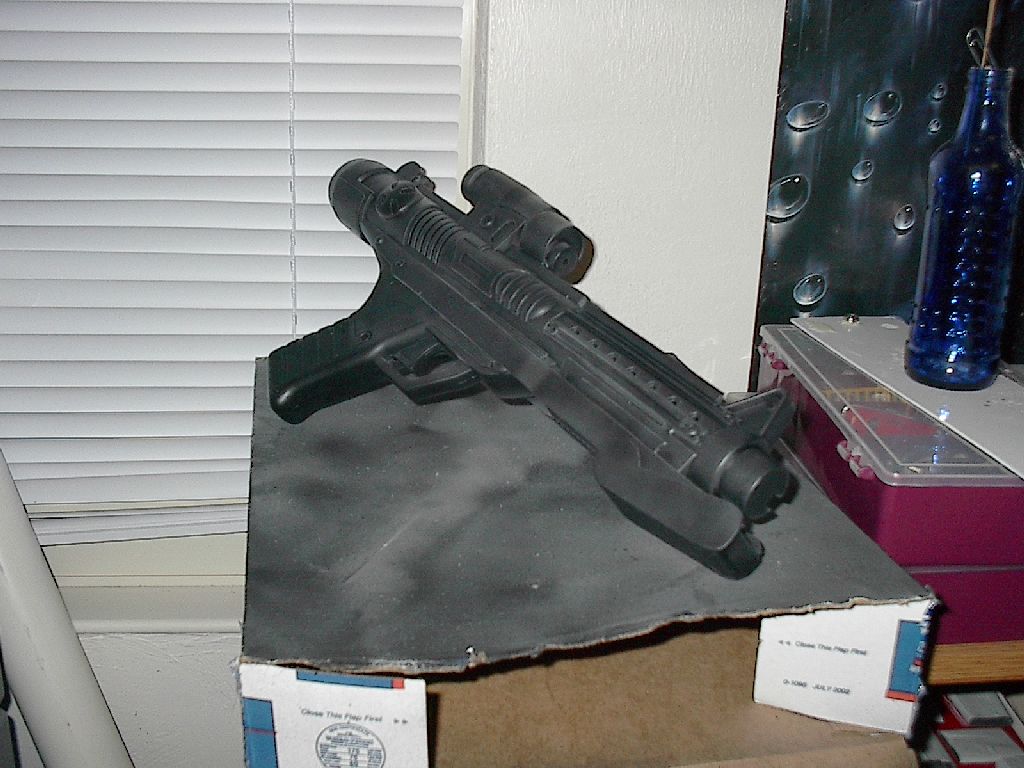
Here's what you should have:
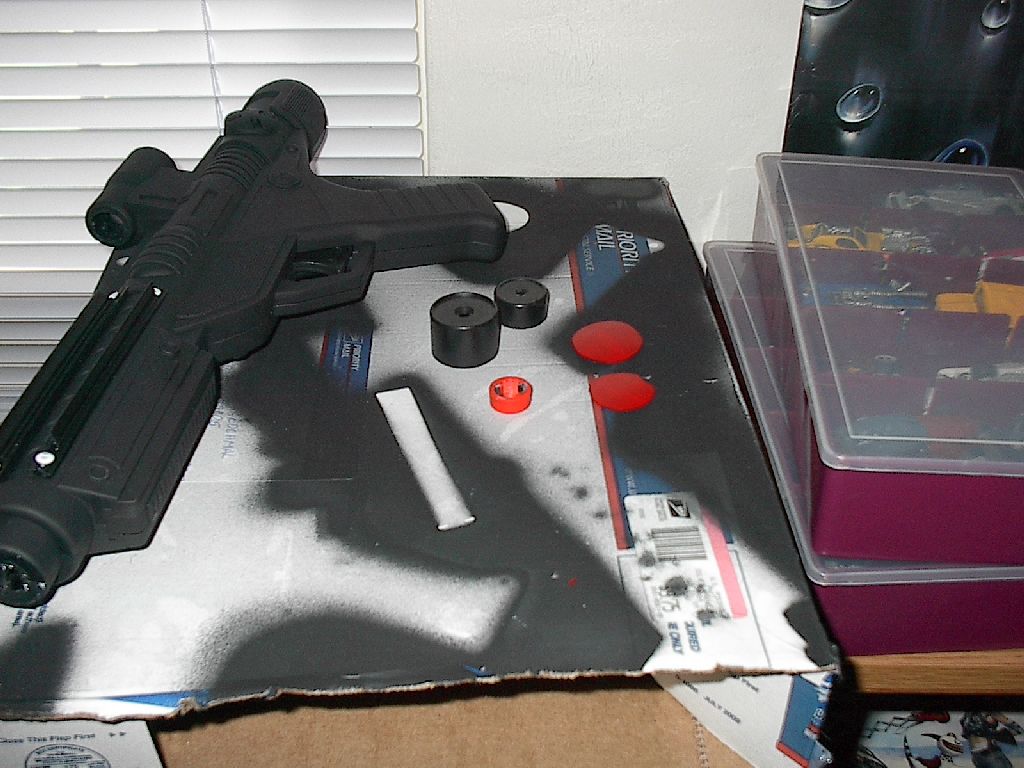
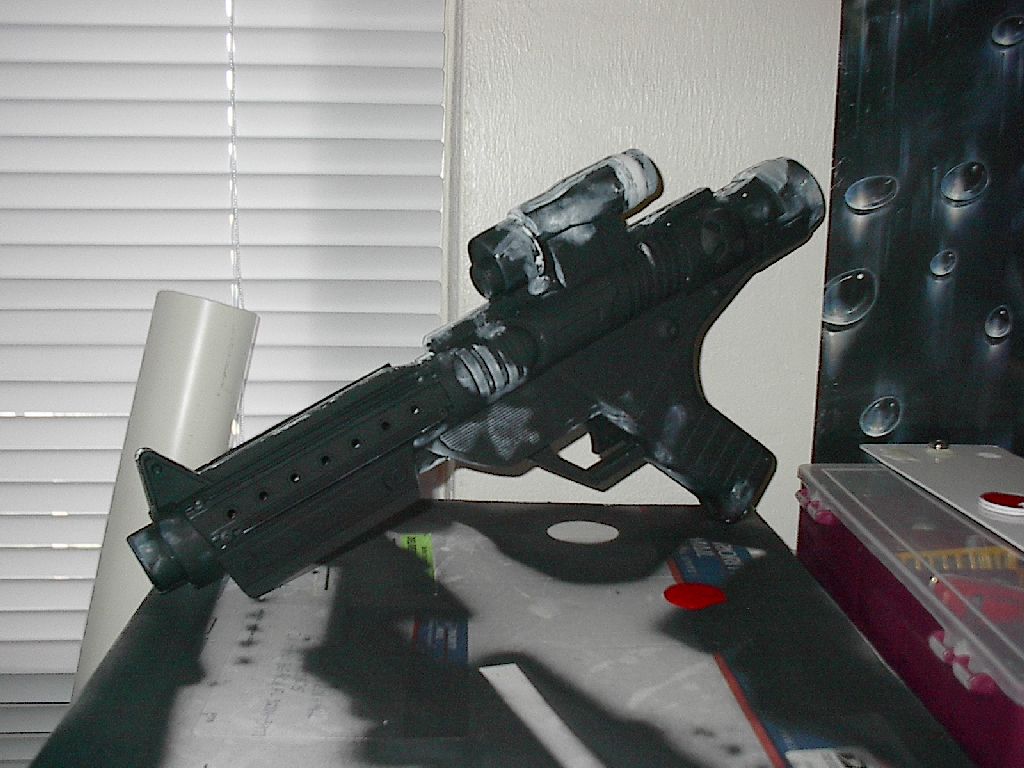
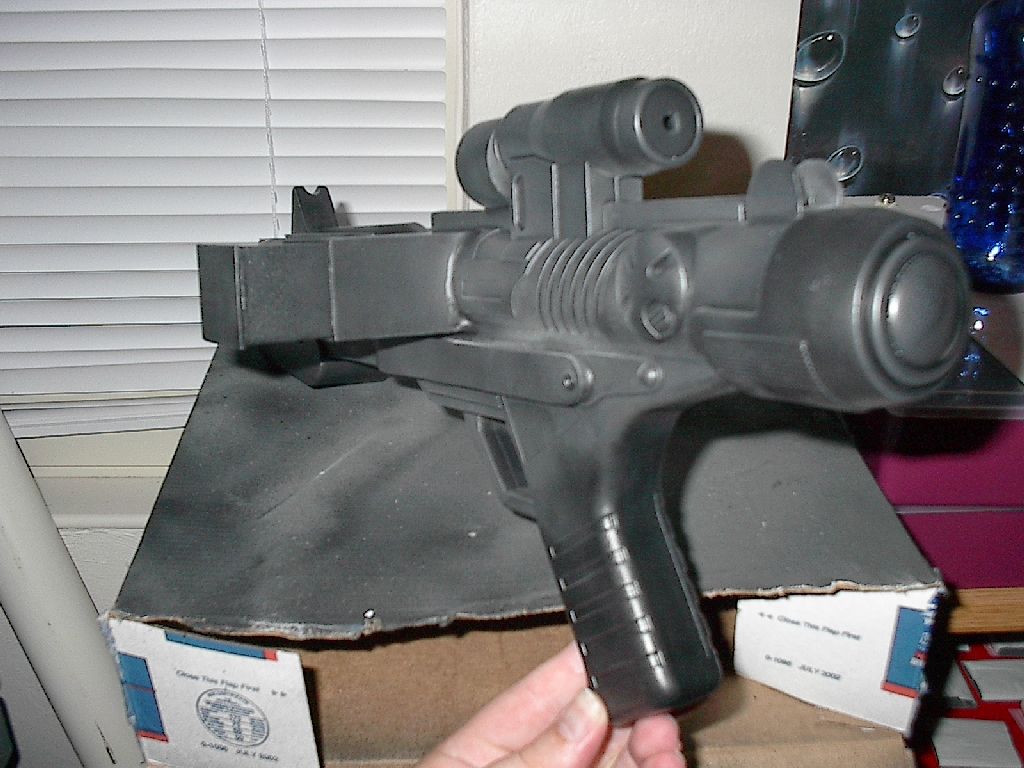
From here on you will never be able to open the gun up again so be sure you have everything situated the way you want it. To accurize the scope, take the large scope piece (originally the back end) and glue a circle of plastic (from the for sale sign) to the cut side. Take the orange muzzle tip and glue it off-center on the other side of the piece. It should just cover the hole in the center. This is now the front piece to the scope. Take the original front scope piece and glue it to the back.
Here's a pic of what I'm talking about:

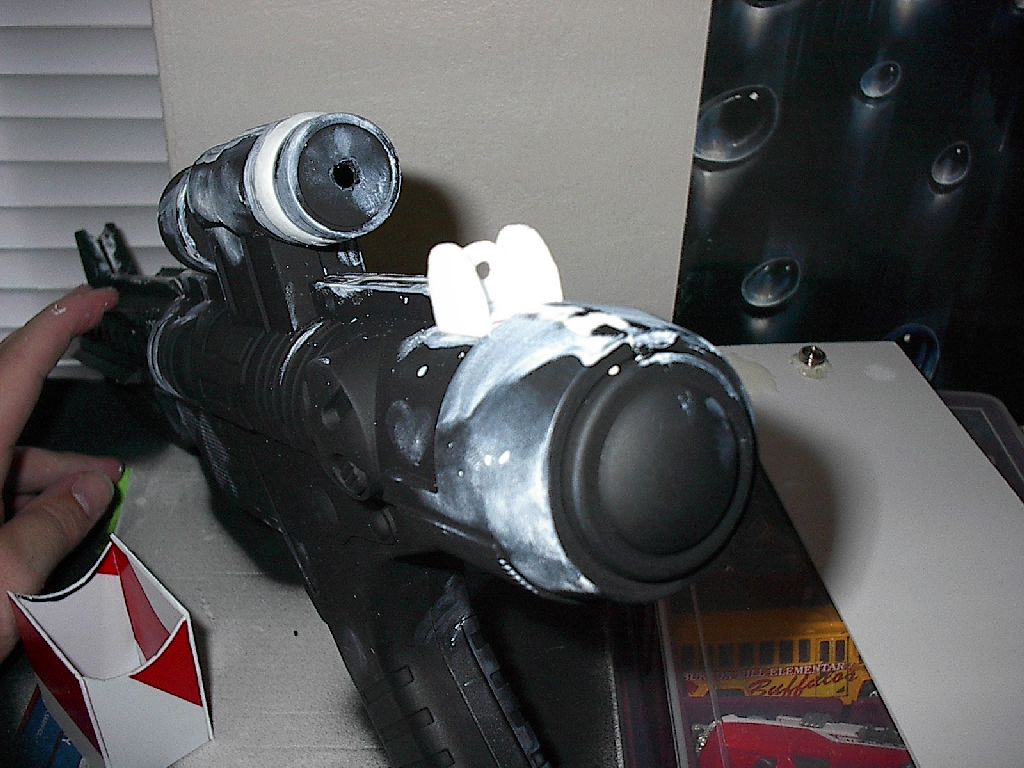
Be sure that the offset piece on the front is centered on the bottom. Once the glue is dry, give it all another coat of black. This will help you see where the gaps are easier. Once the paint is dry, it's time to putty.

Take modeling putty to all the seams. I added a beveled edge around the join of the rear piece of the scope in order to give it a smoother appearance. Use more plastic from the sign to make some detail bits like the rear sight piece and frontcap.

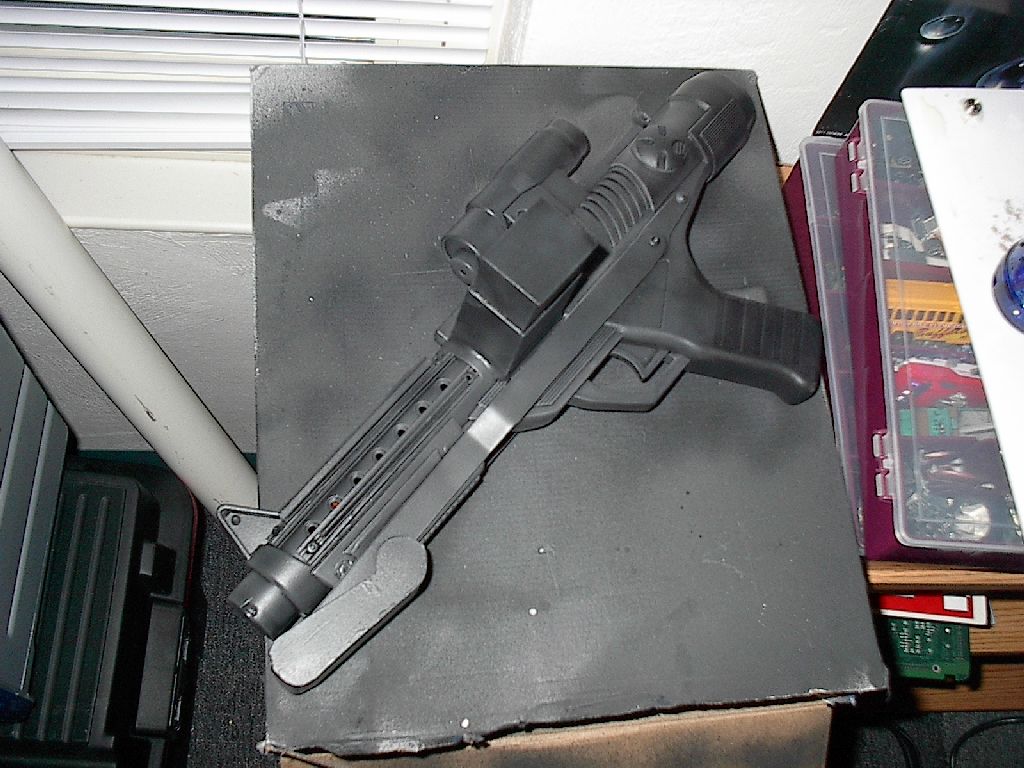
Once the putty is dry, sand it flush and then give the gun another coat of black. While that is drying you can work on the powerclip and folding stock.

I just guesstimated on measurements for mine. The folding stock isn't functional, it's used to hide the protruding part on the bottom of the barrel. I made my powerclip just big enough to completely cover the oval bit of raised detail on the side of the gun. Give everything a final putty then another coat of black. Be sure and fill in the screw holes.
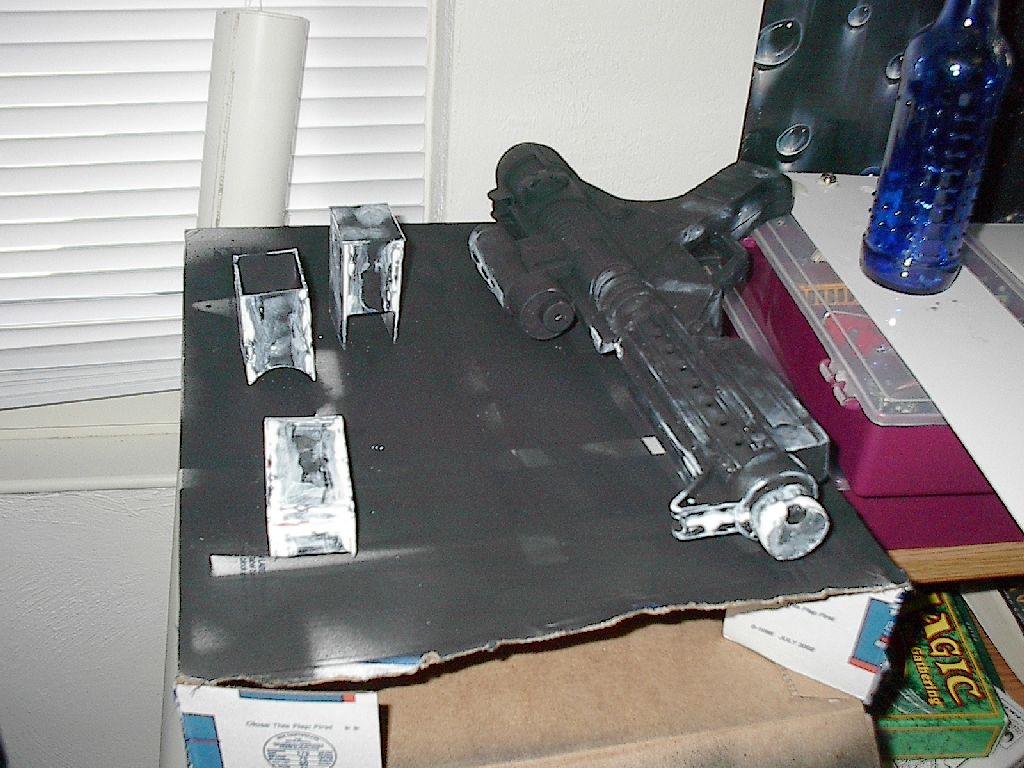
Once everything's dry, glue the powerclip on with epoxy. You may need to putty around the edges again when the epoxy is dry in order to get a flush look. Depends on how detailed you want to get.
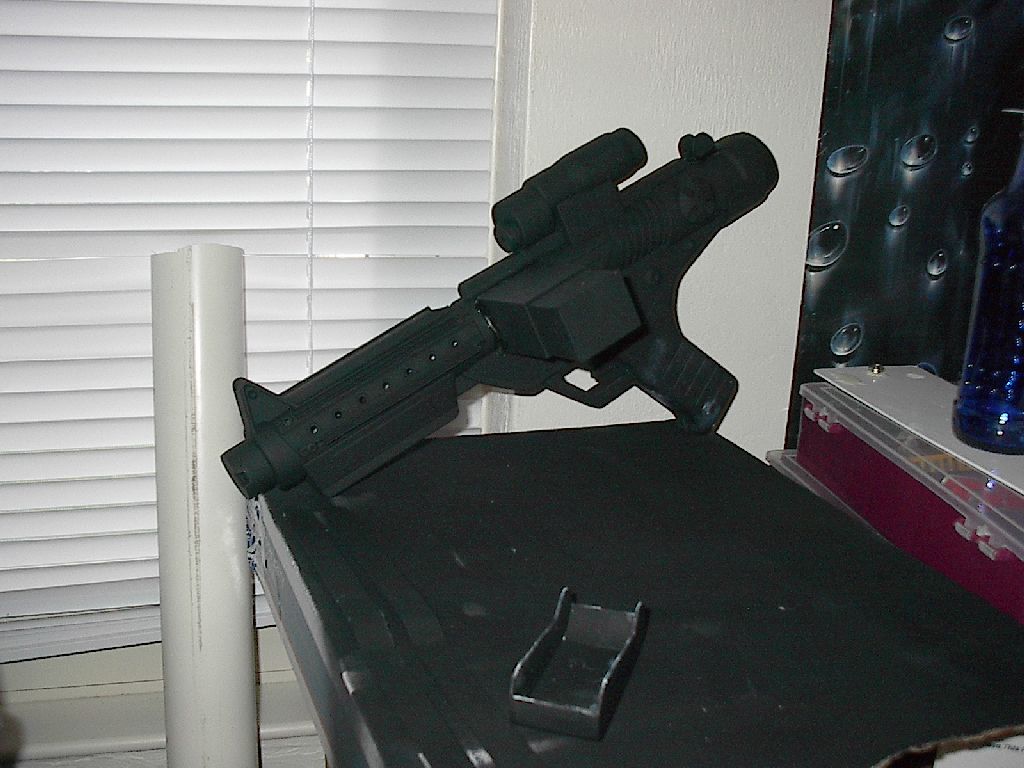
Another coat of paint and then you can install the stock. I riveted the rails on at the divot in the upper part of the handle, the front part was glued together with epoxy.
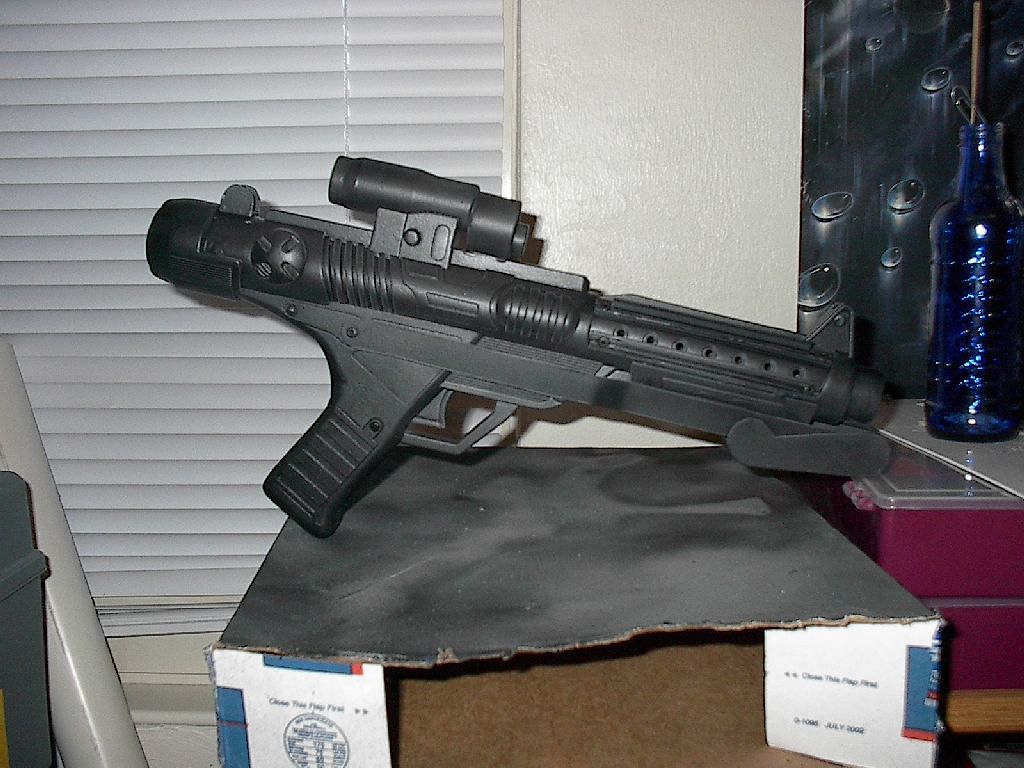
Some touch-ups with the black and then a clear coat and you're done.

The clear coat made it a bit glossier than I want it but it's not too bad. I may add some weathering later. The front of the barrel is a bit strange without a hole in it so I added a greeblie from my bits box. I only wound up using about half of the for sale sign so you don't need one that's too big. If you don't have a rivit tool you can just use glue but I think the rivits are a nice added detail. Don't worry if you don't have sculpting tools for the putty, I just used my finger for most of the work. All of the cuts can be made with the exacto knife but I find that the jeweler's saw is faster. Overall this was an easy and fun project. Please email me with any comments or suggestions.
My second, more accurate blaster tutorial can be found here
Tweet
