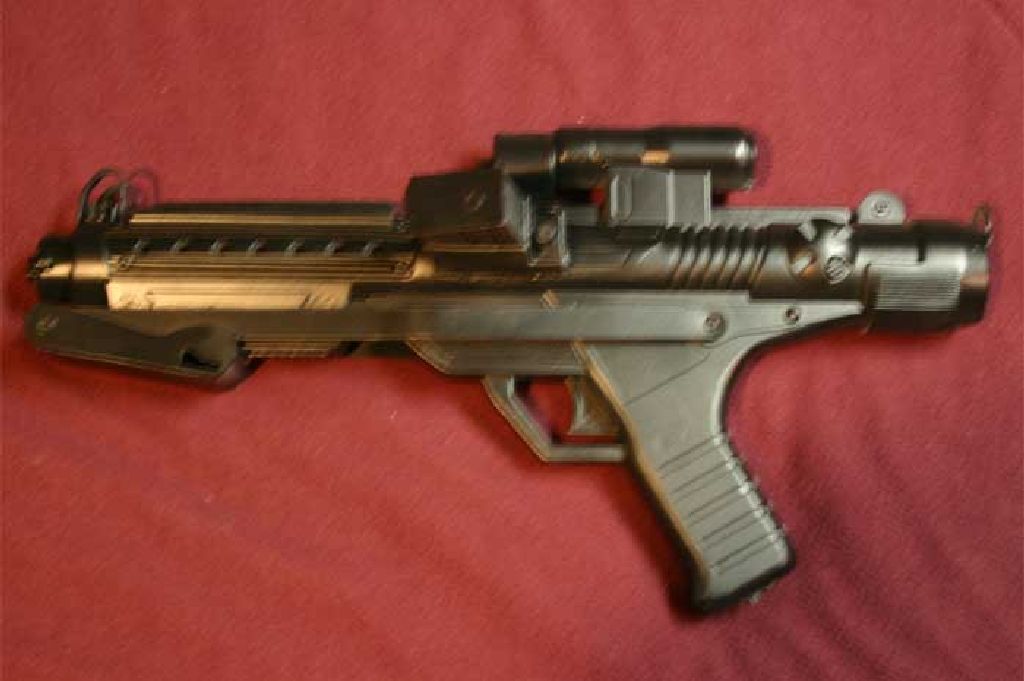
Stormtrooper Blaster (Mark 2)
After trooping with my first blaster for a few years I finally found the time to make a better one. For this version I used the same principles as before but paid more attention to creating an accurate representation of an E-11. A few things I wanted to improve were:
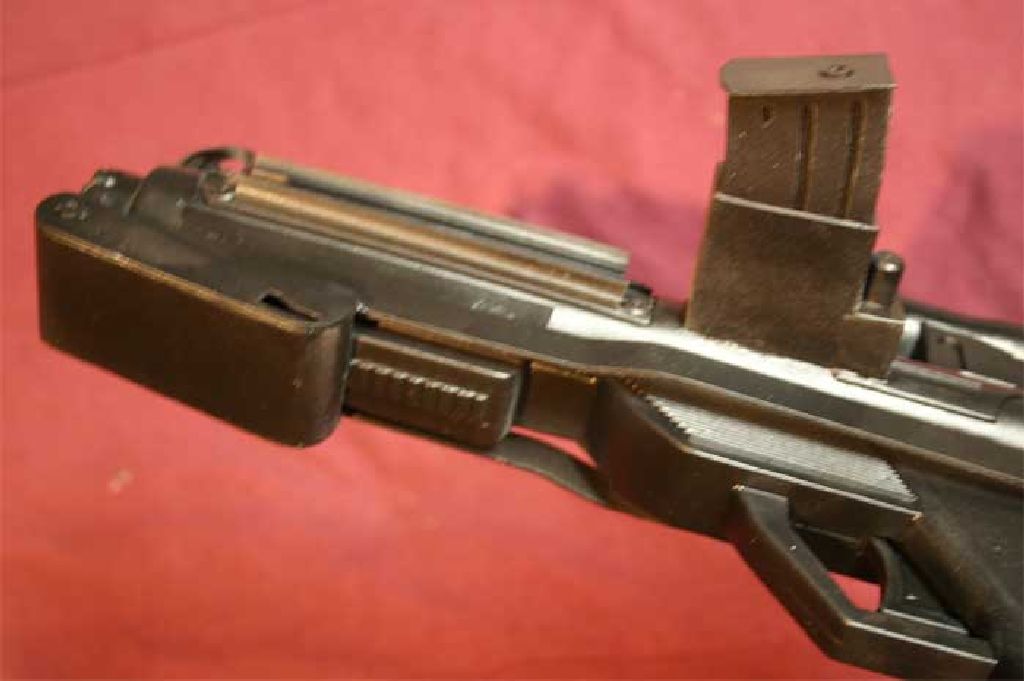
- More accurate power clip
- Ejection port
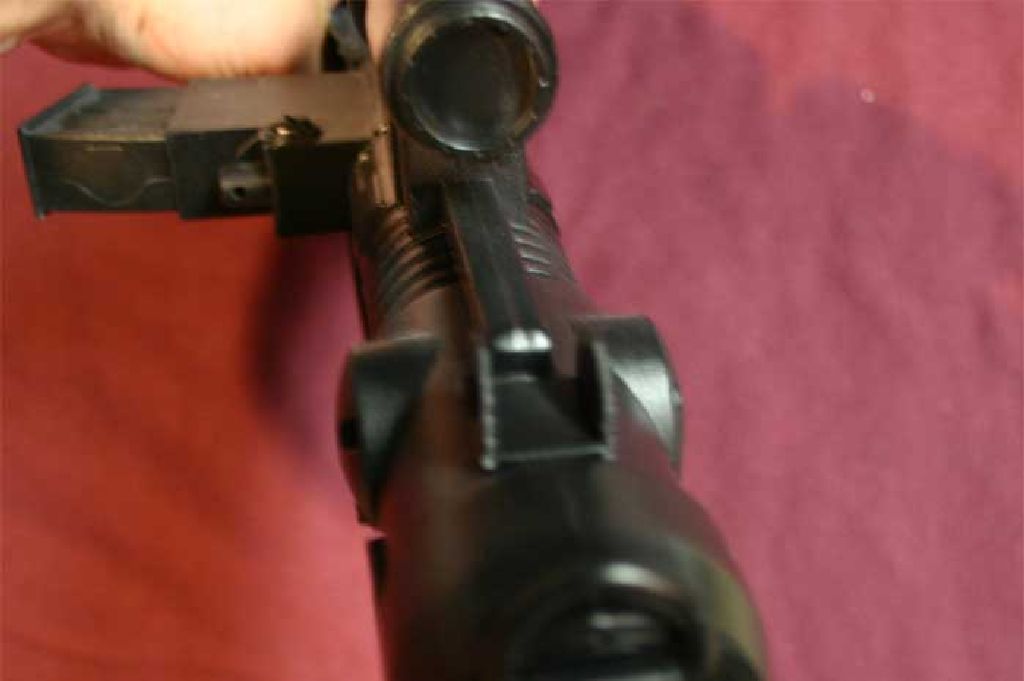
- Sights
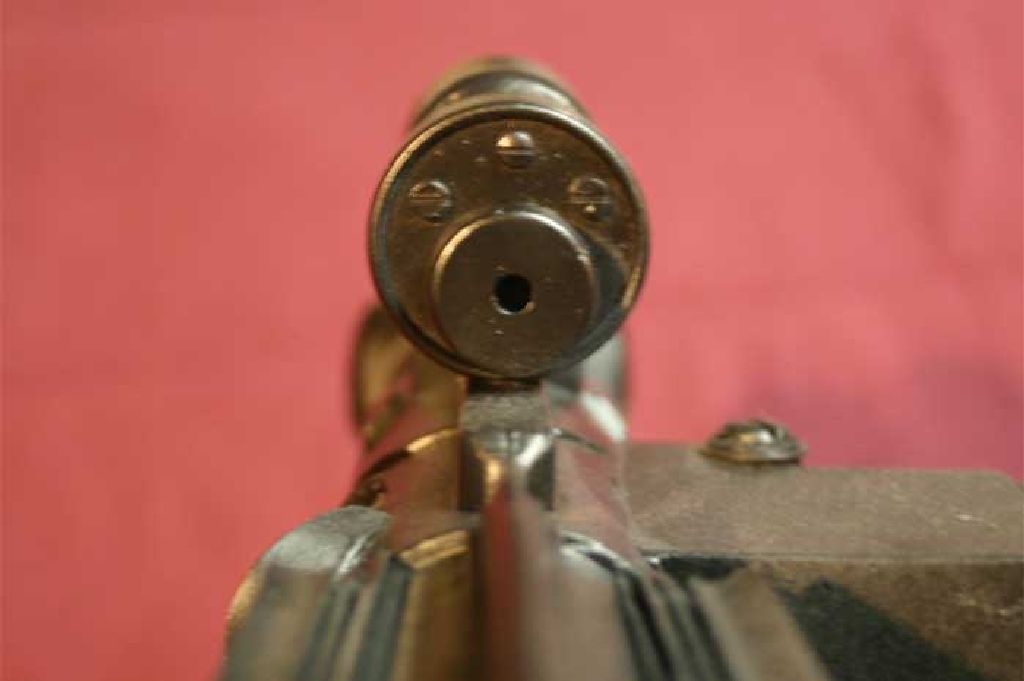
- Muzzle
- Added laser pointer
- Overall details
The gun was disassembled as before.
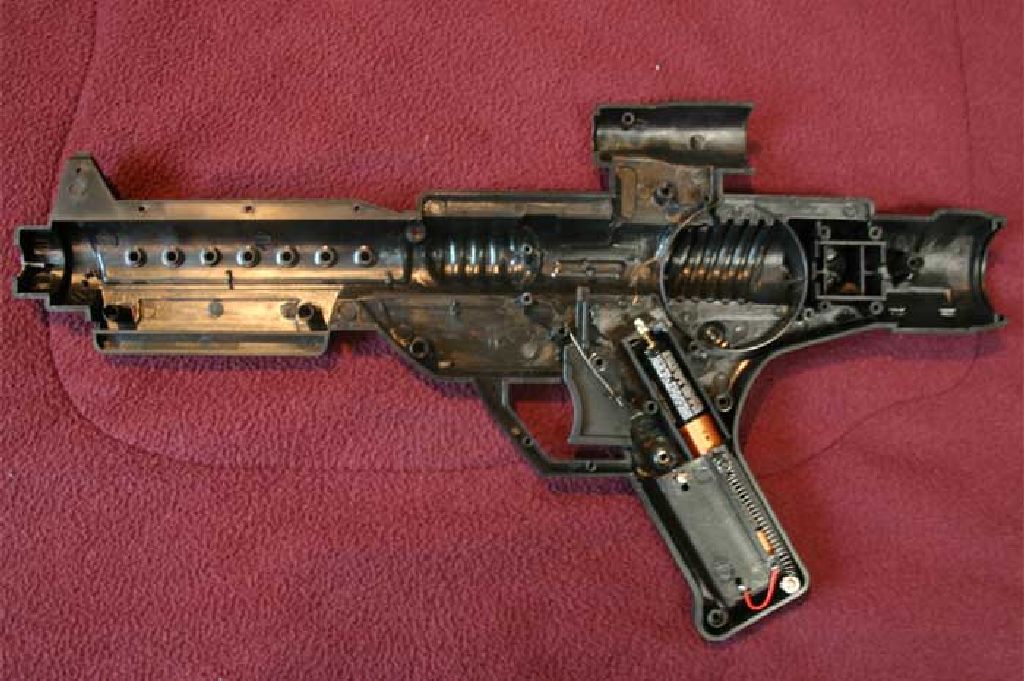
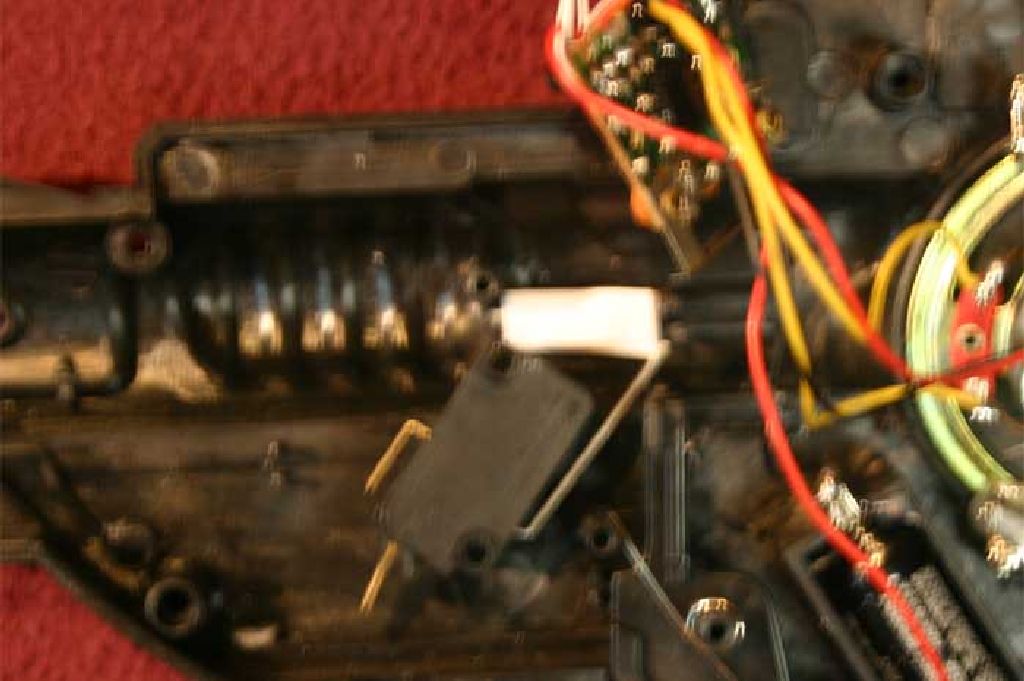
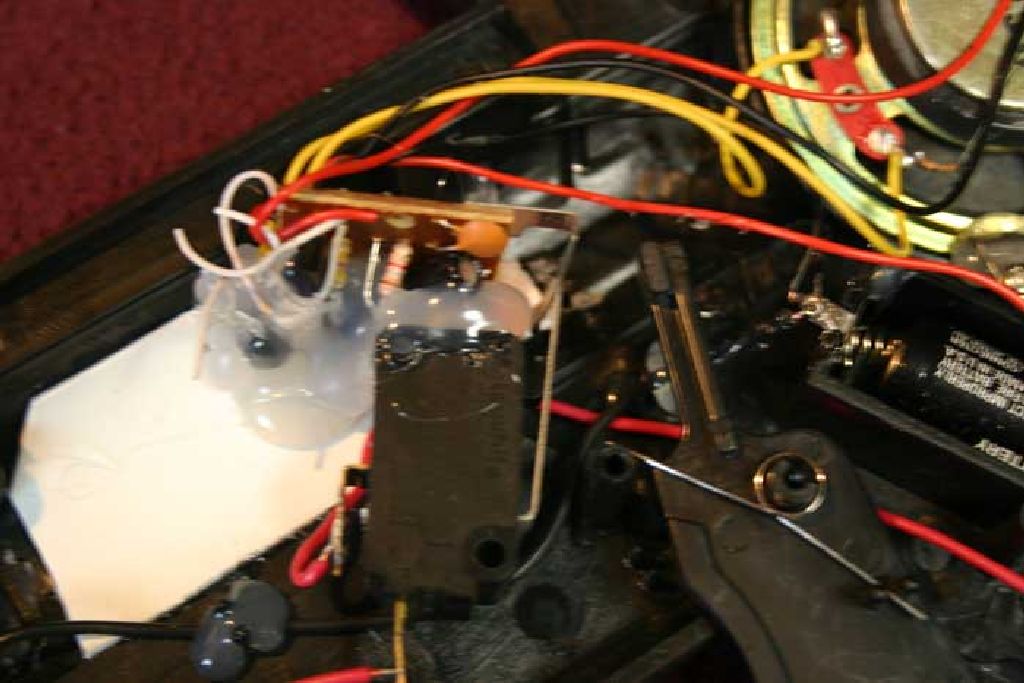
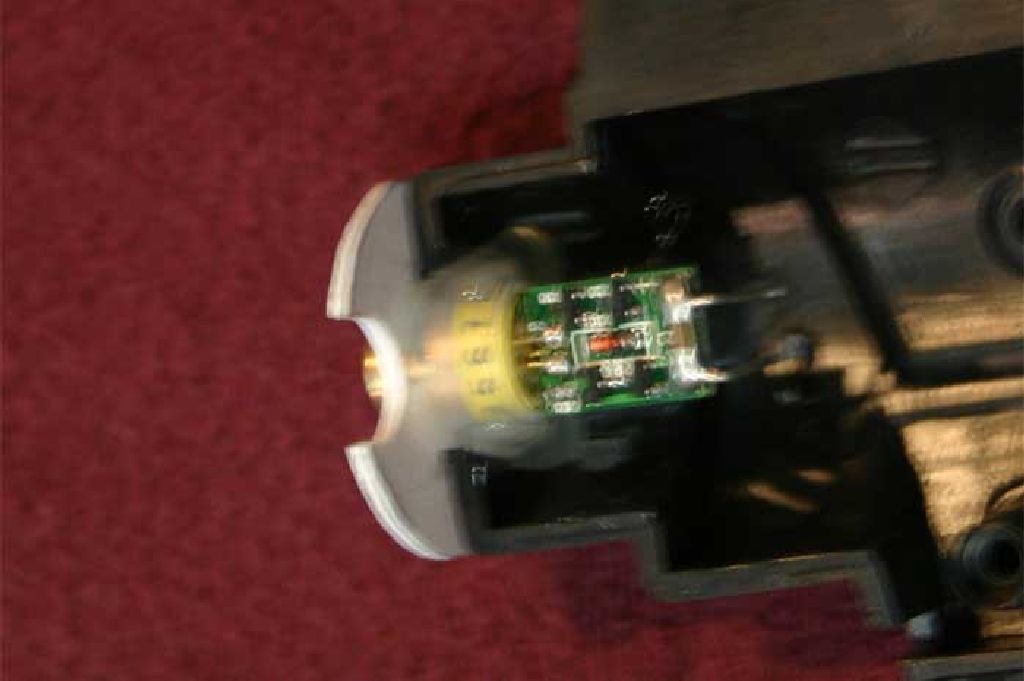
Initially I wasn't going to leave in the sound and vibration but now I'm glad I did. The first thing to do was figure out how to connect the trigger to the laser pointer. Fortunately I happened to have scavenged an old printer recently and there was a perfect switch for the job. If you don't have any busted printers these switches are common and can be found in most Radio Shacks.

To mount the switch I ground off one of the PC board mounts with a Dremel and then built up a stand out of scrap plastic that would set the switch at the height to be contacted by the trigger.
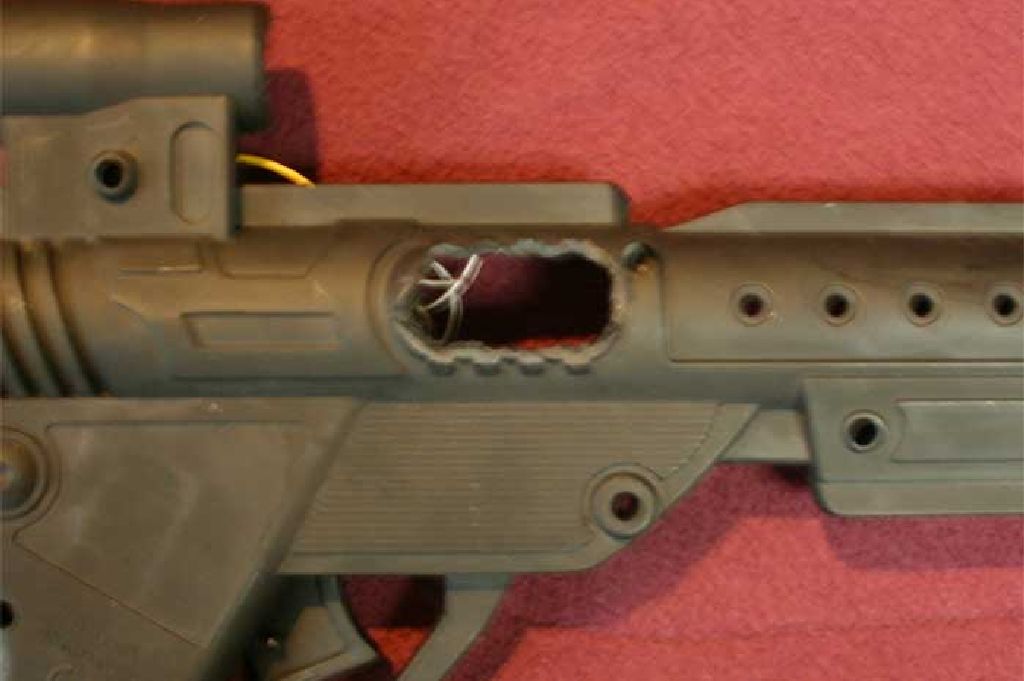
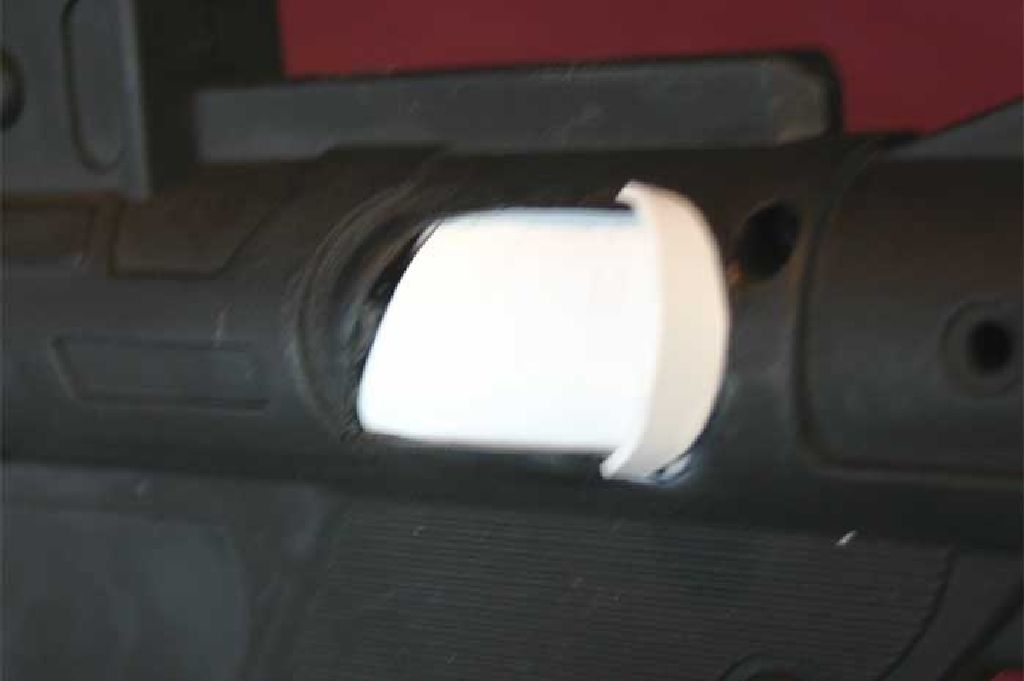
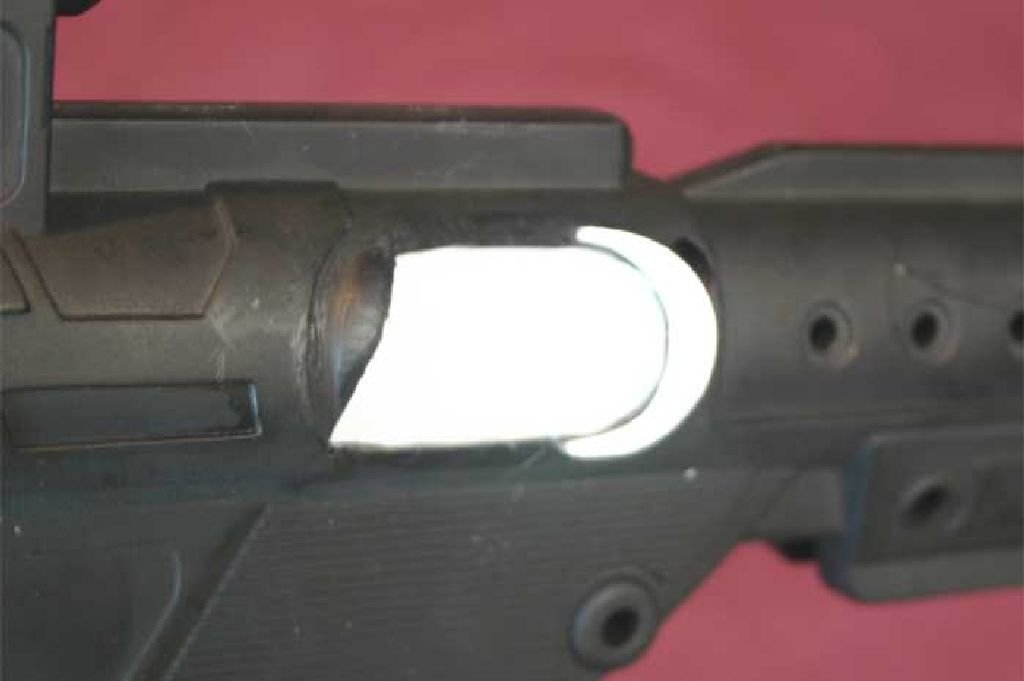
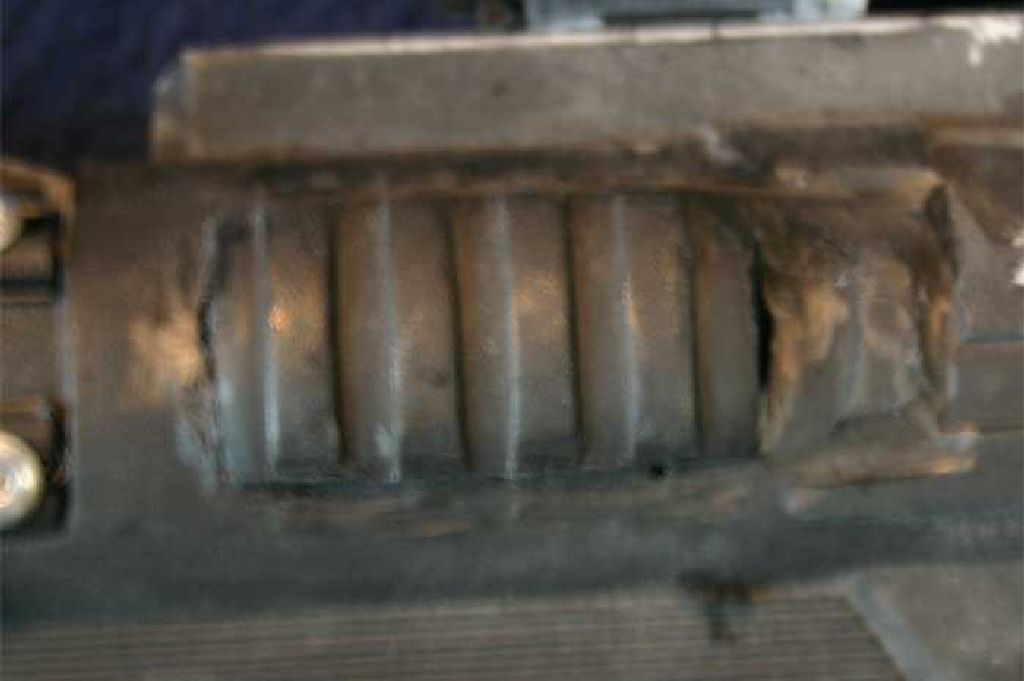
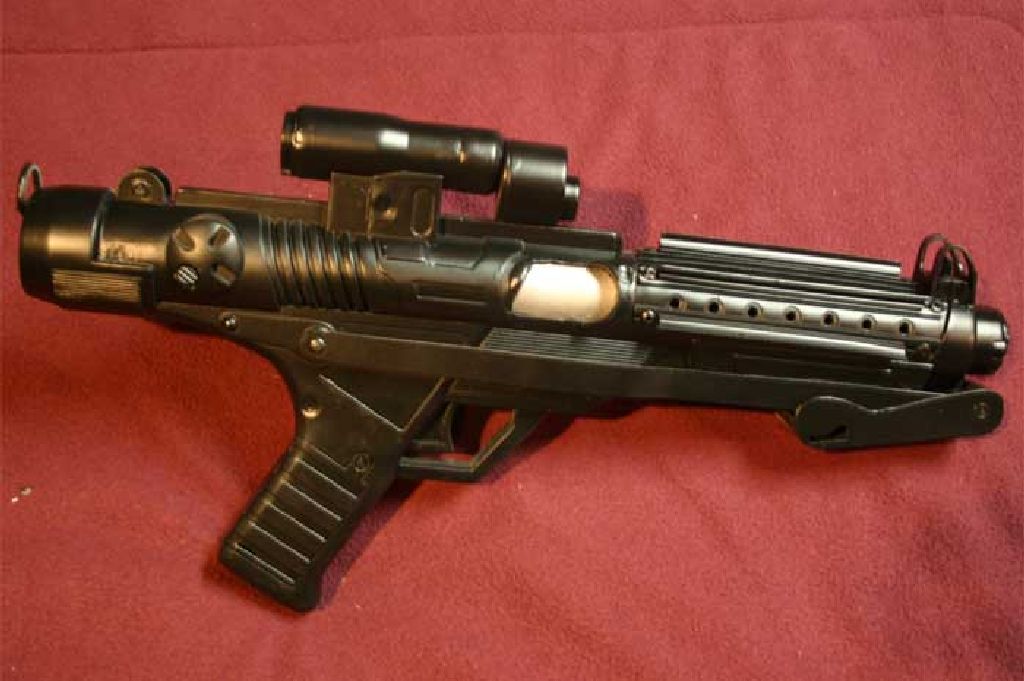
Next I cut out most of the oval detail which would be my ejection port. After a lot of trimming and grinding and some more scrap plastic I had my port. I had to leave the upper PC board mounting pole since I needed to use it as a stabilizer for the PC board when I reattached it in the gun. It meant that I wound up with an odd bump at the back of the port but I can live with it. If that part didn't make sense don't worry, it's explained more further on.


It was after I had the switch in place that I realized that I could keep the sound and vibration. Since the switch I used extended well out from its edge I could use the switch's arm to activate the circuits. I wedged the PC board horizontally above the switch using the upper board mounting pole as a vertical stabilizer. Getting the positioning accurate was important so the sound would go off and the laser would light at the same time.
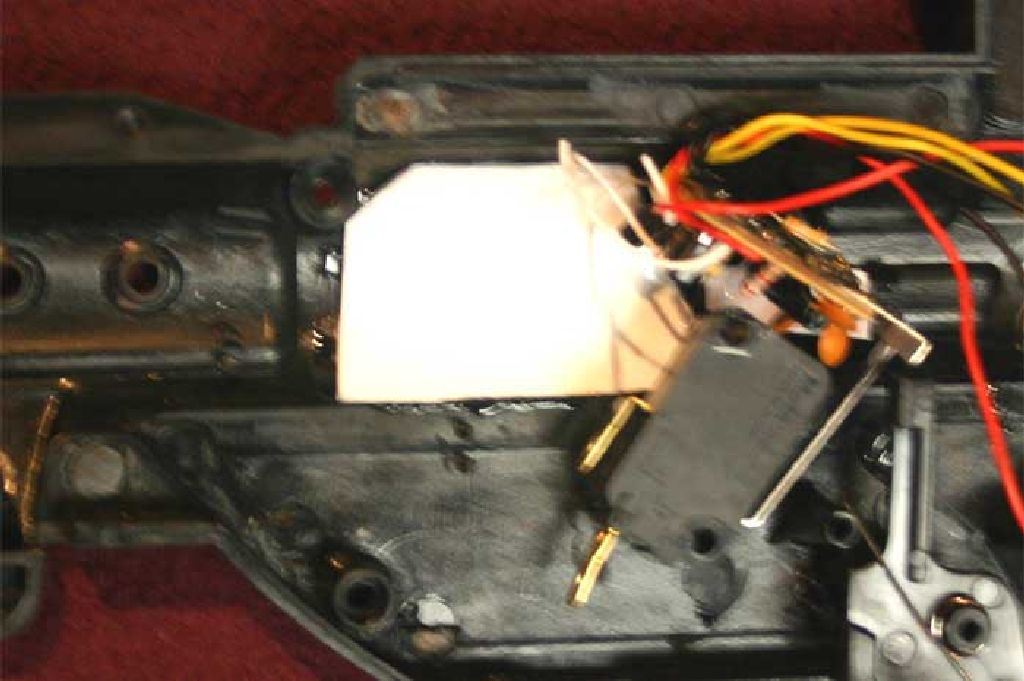
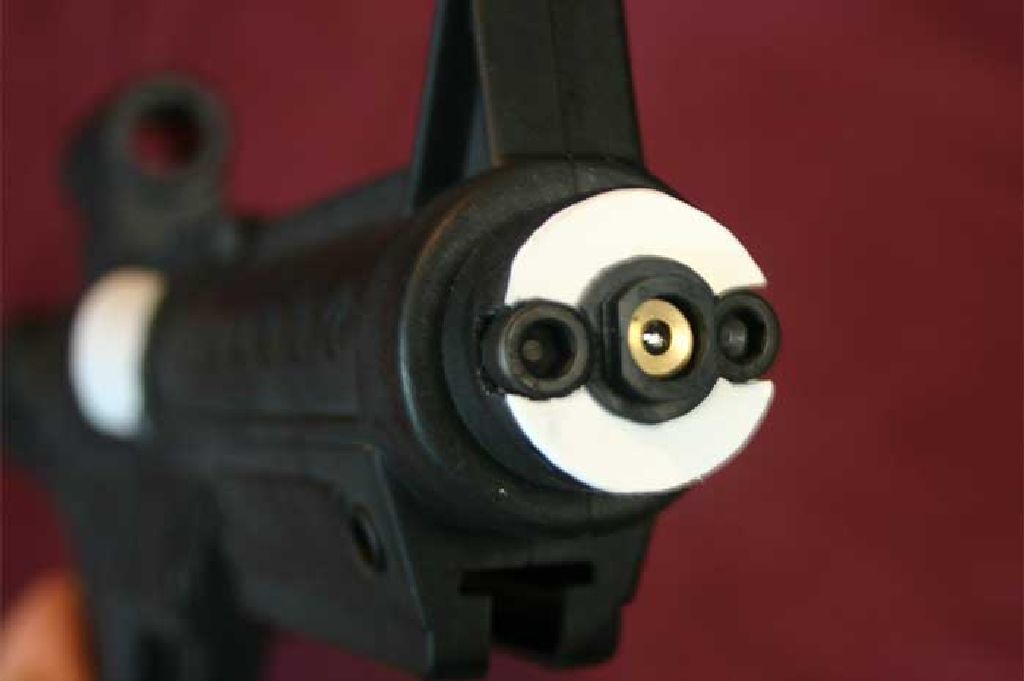
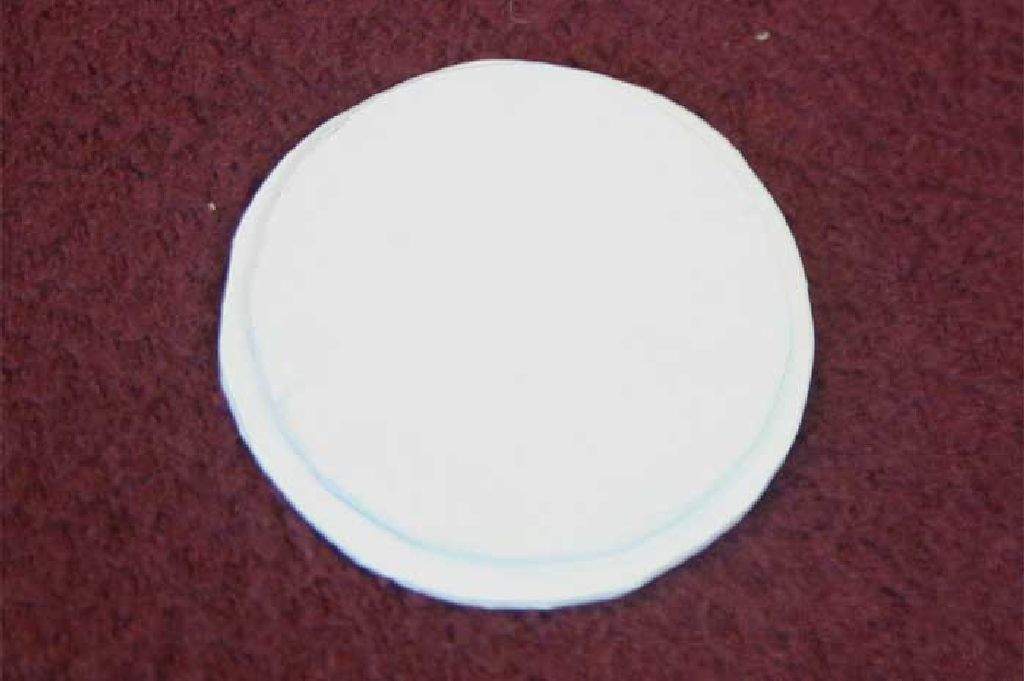
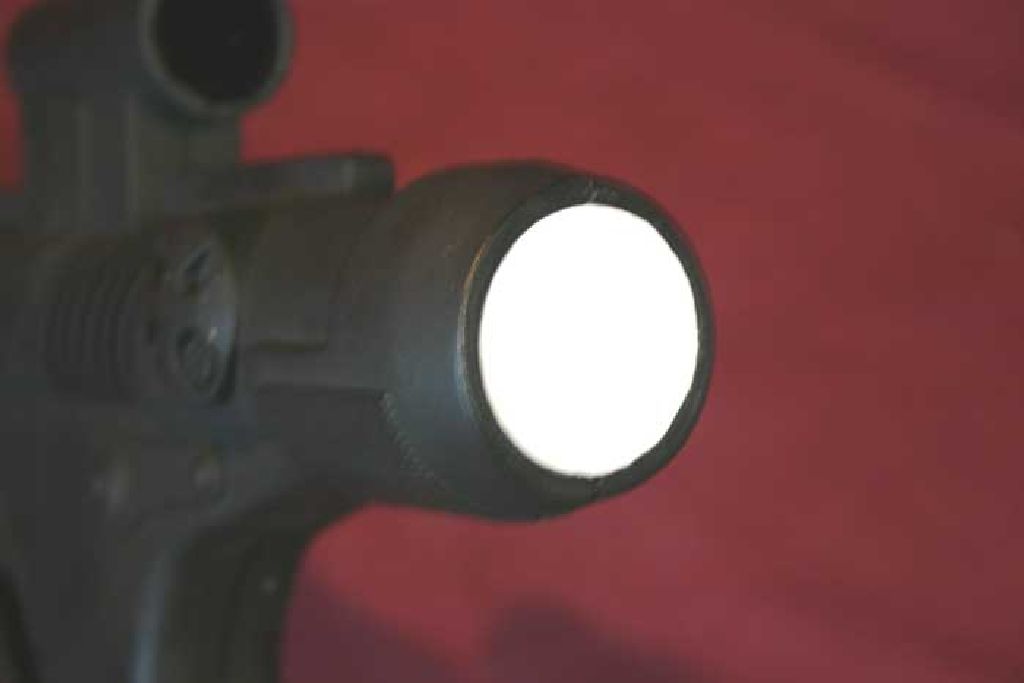
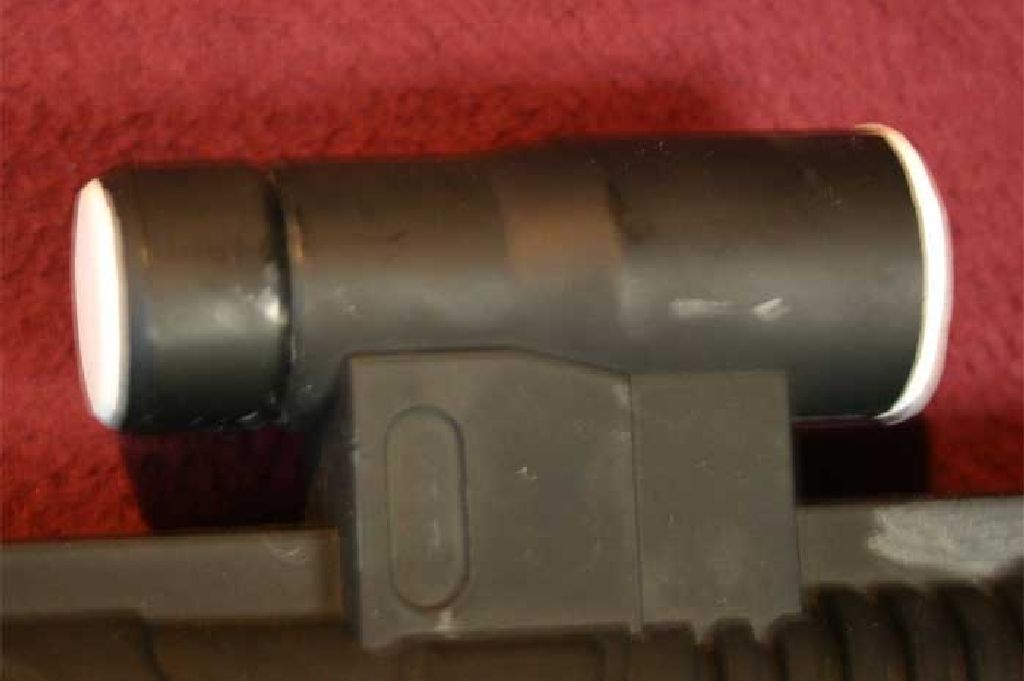
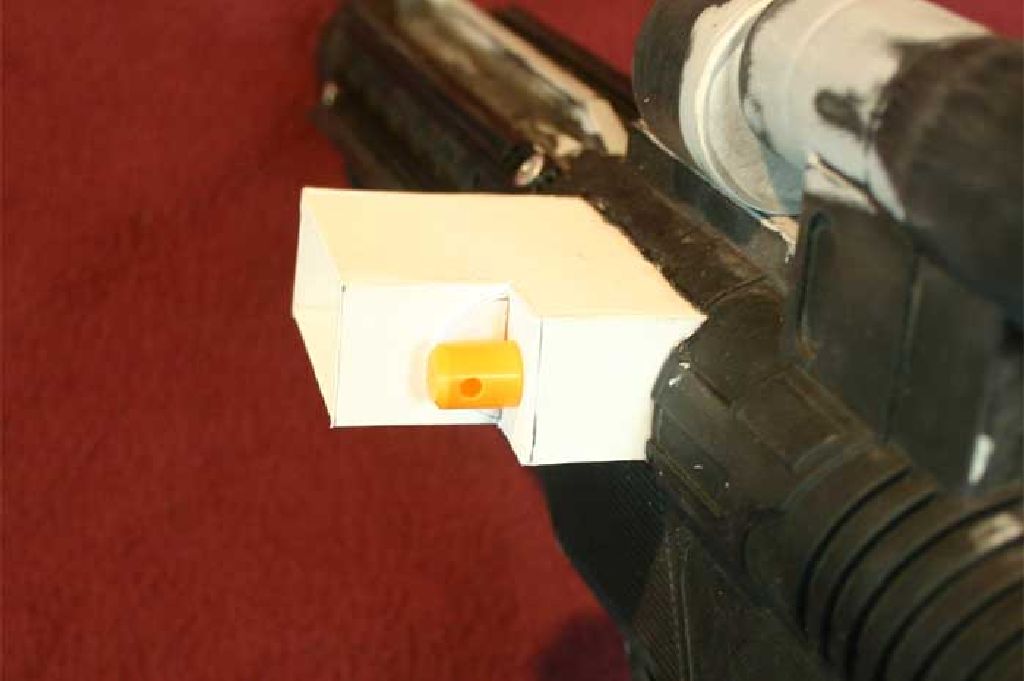
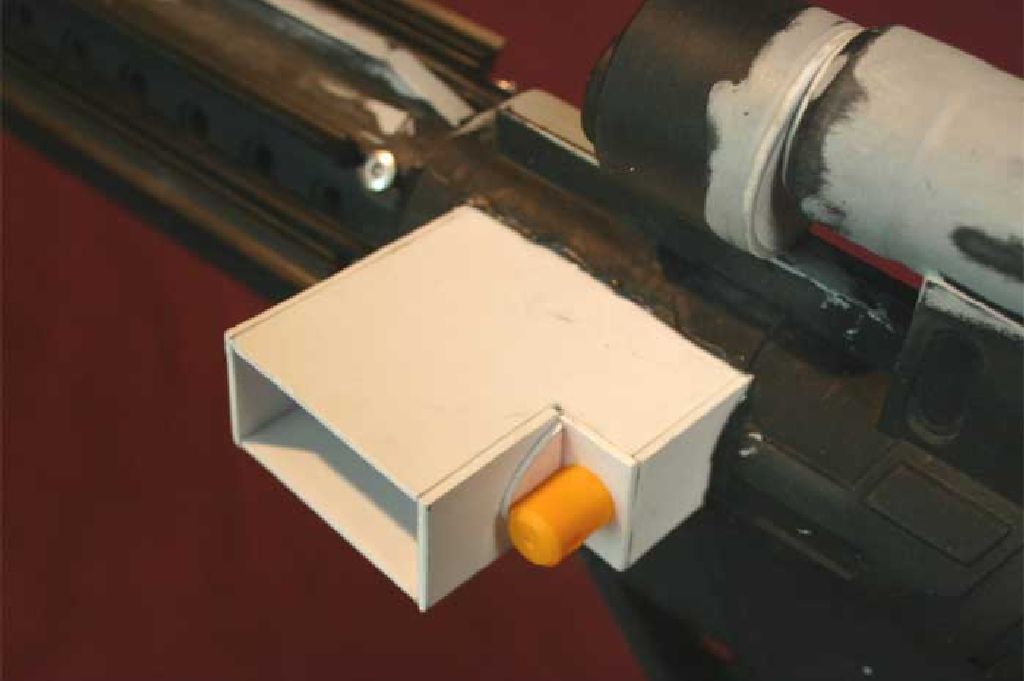
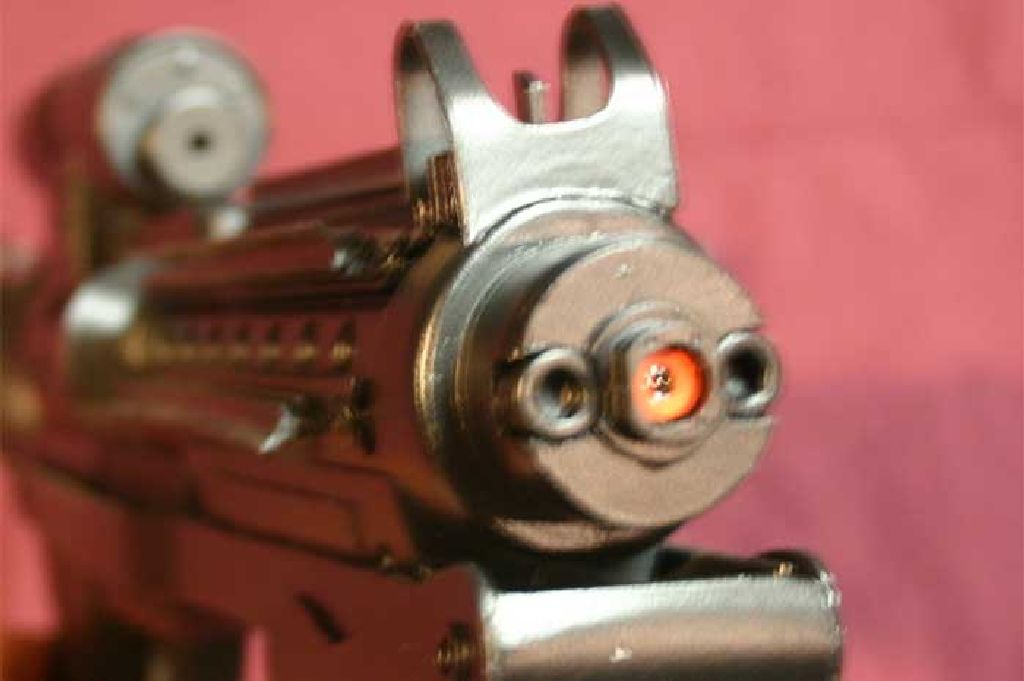
For the muzzle I started by gluing a circle of card to the front. I found two 1/2" long 1/4" head hex screws at the hardware store. The edges of the muzzle were trimmed out and the screws were hot glued into place.


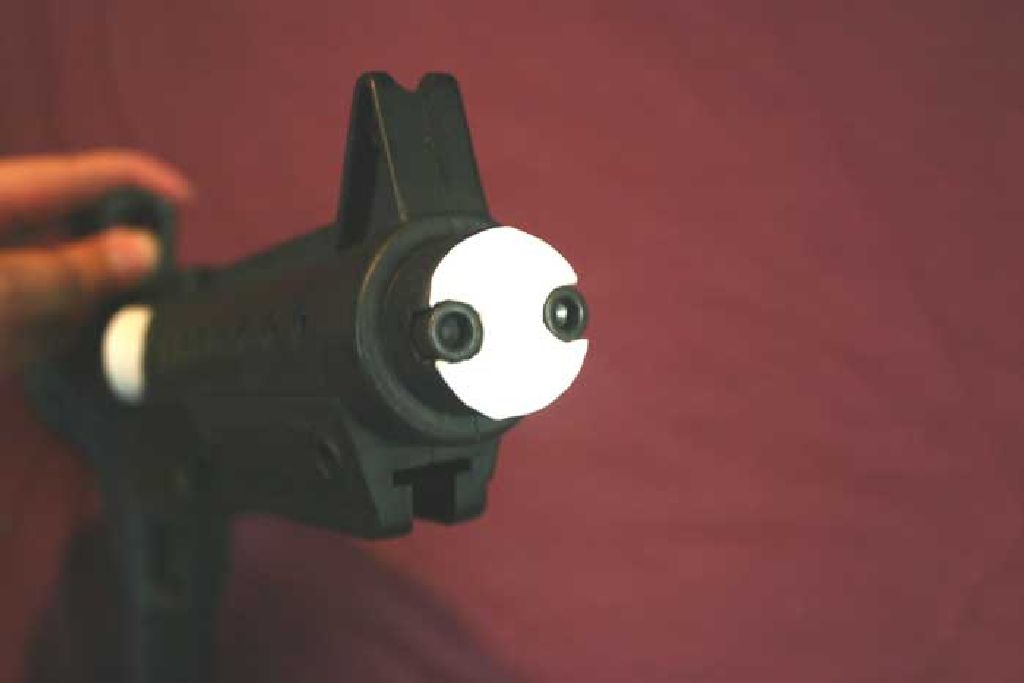
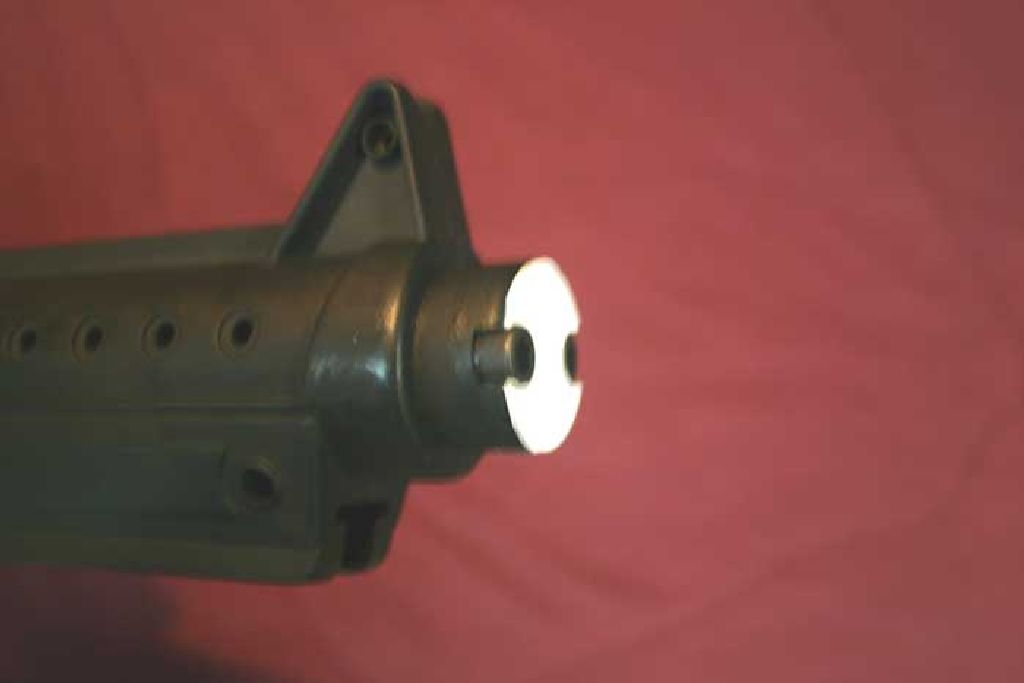
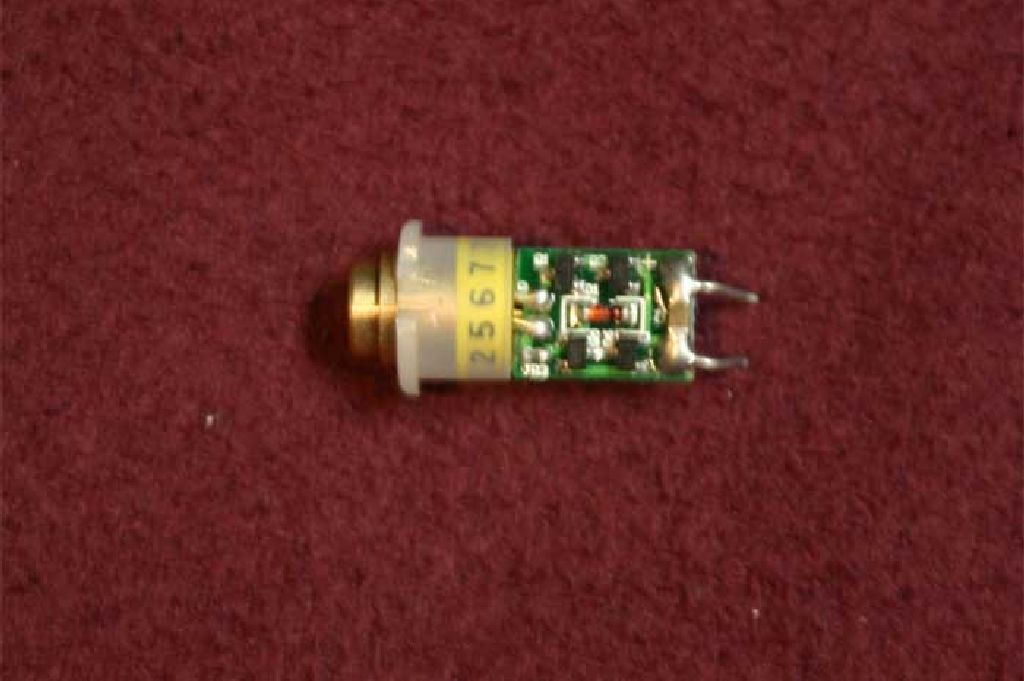
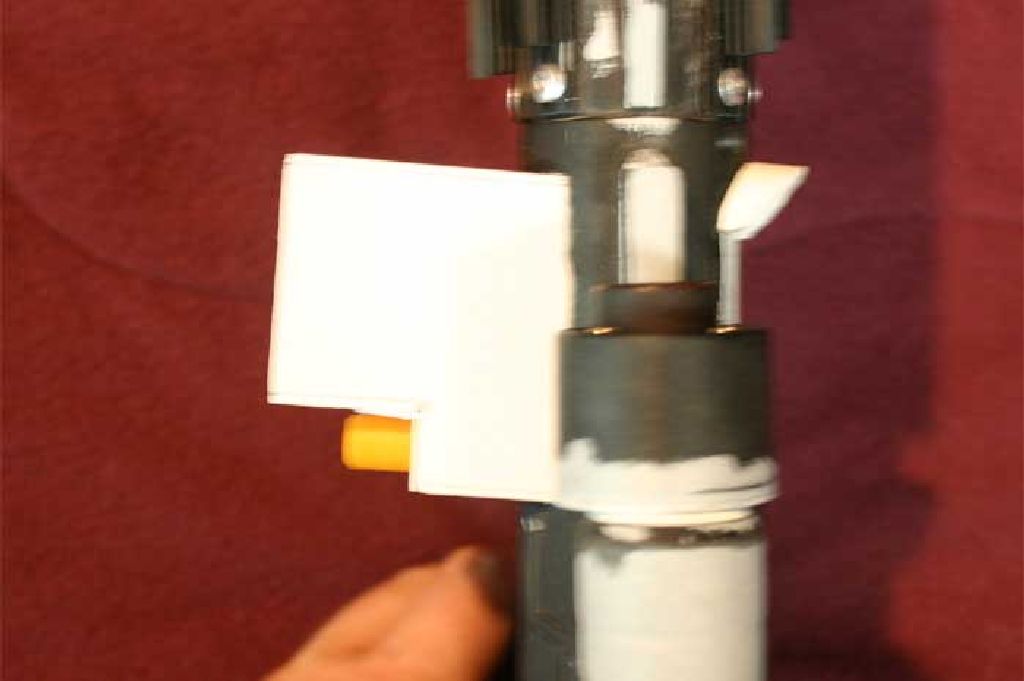
I got my laser out of a broken digital projector remote control which meant it already had leads to solder to. You can use pretty much any laser you have handy but some are easier to take apart than others. Be sure you have the power connected to the correct terminals and that you don't bypass any internal circuitry. If you find that the laser's output dims to where it is difficult to see across a lighted room then you've probably fried it. I used a protective cap that came on the end of a mouse cable as a mounting bracket then hot glued the whole thing into place. For the tip I used a piece from my bits box, it's not exactaly accurate but it's good enough for me.
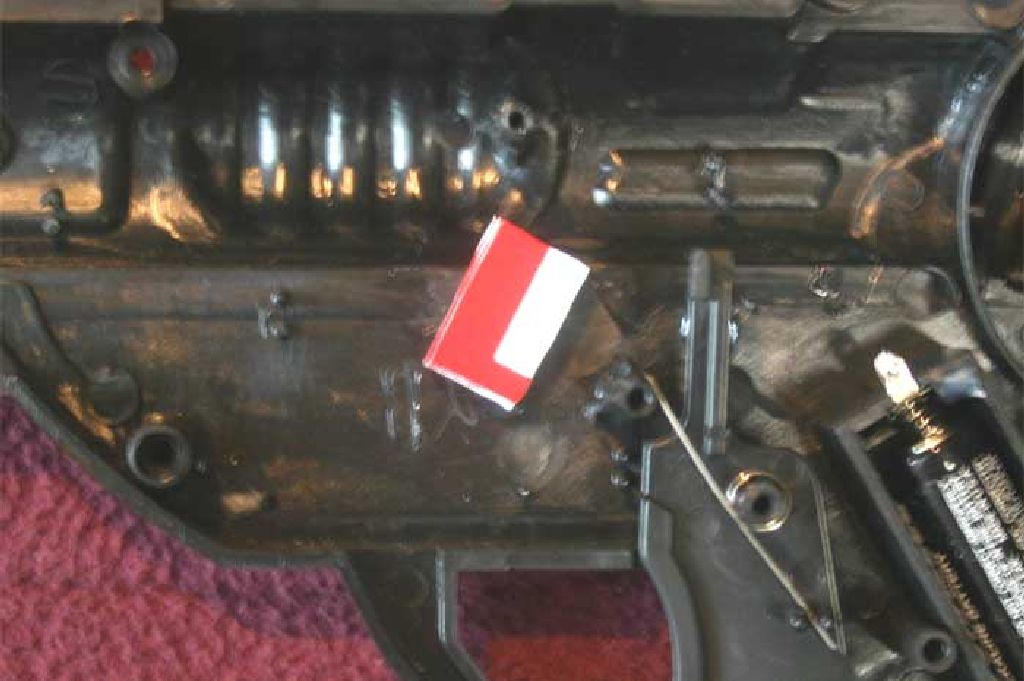
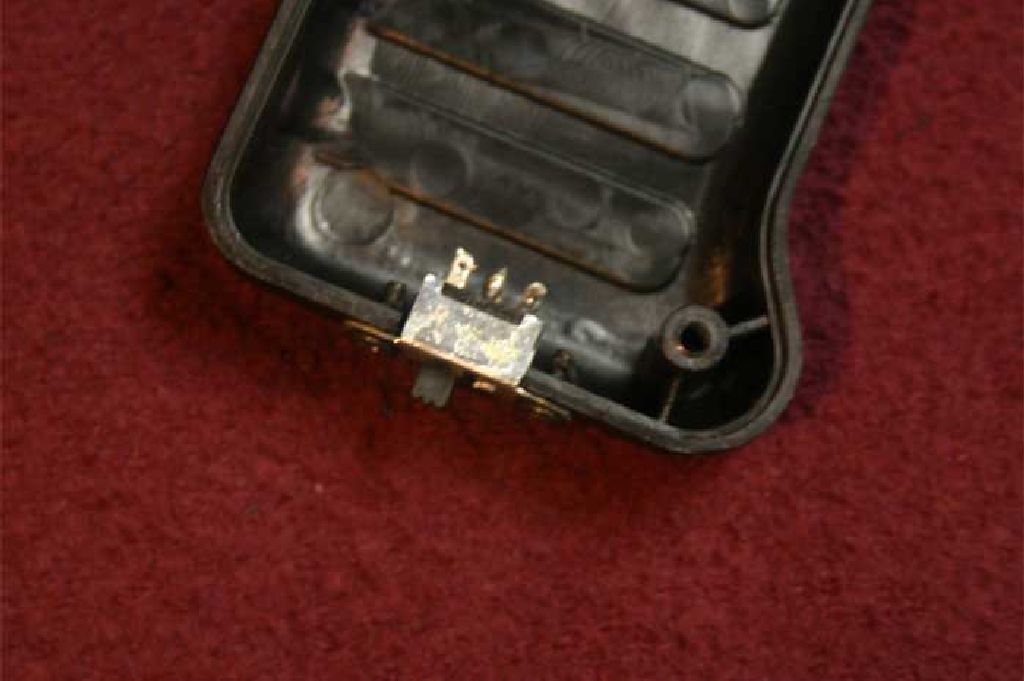
I realized while making this that laser pointers aren't exactaly legal in all areas so to keep myself from getting fined I added a switch on the bottom of the grip that would let me turn off the laser pointer while keeping the sound and vibration. The switch is a micro SPDT switch from Radio Shack. A SPST could be used instead, that's just what I had on hand. A small slot had to be cut in the opposite side of the gun handle so the halves could be put back together.


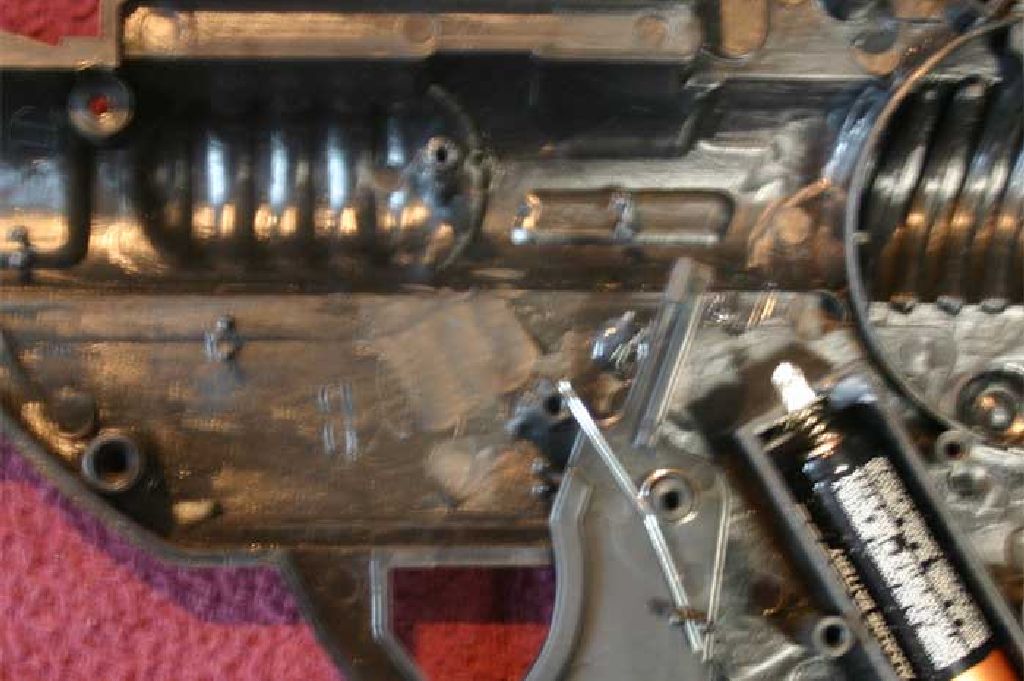
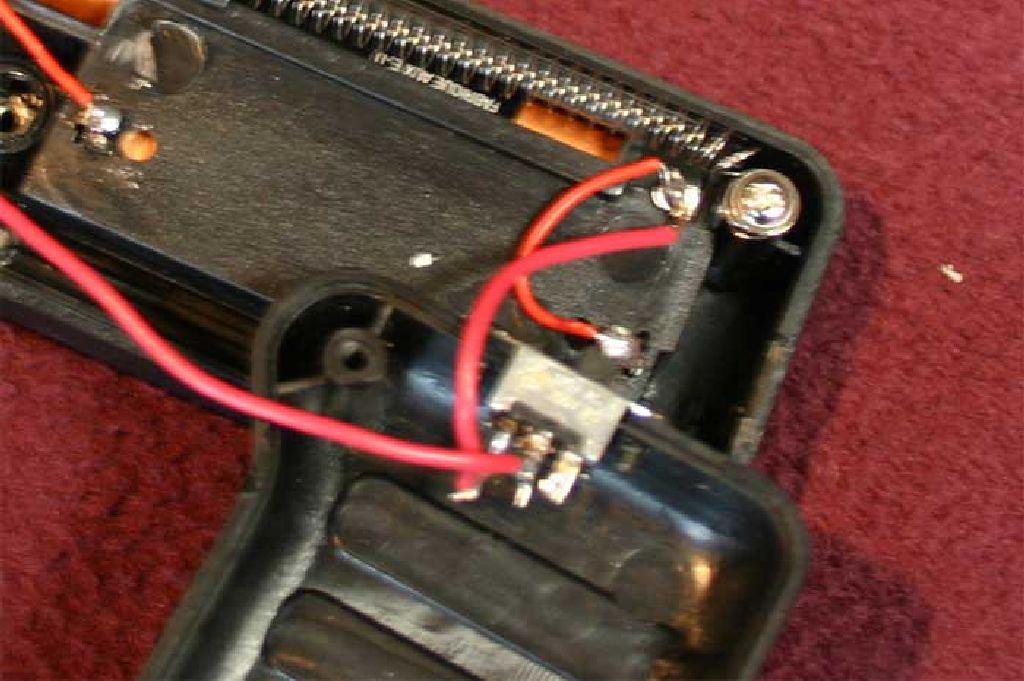
My laser only takes 3 volts to power while the batteries in the gun supply 4.5V. To make the whole thing work I made the following connections:
- The negative side of the batteries was connected to the negative terminal on the laser.
- The positive side of the laser was connected to one side of the trigger switch.
- The other side of the trigger switch was connected to the center post of the micro switch.
- A side post of the micro switch was connected to the positive side of the second battery, just before the wire bridge. The picture shows this better, basically the laser runs off 2 of the batteries while the rest runs off all three. Your laser may be different, just don't use too much power or you'll blow the laser diode and it will either get very dim or stop working all together.
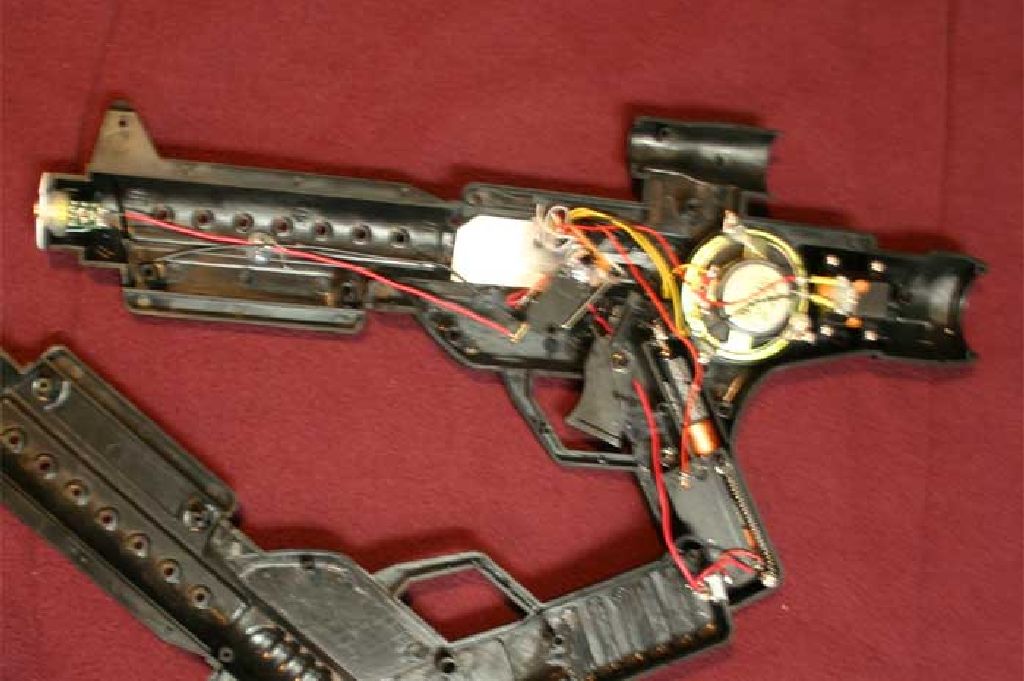
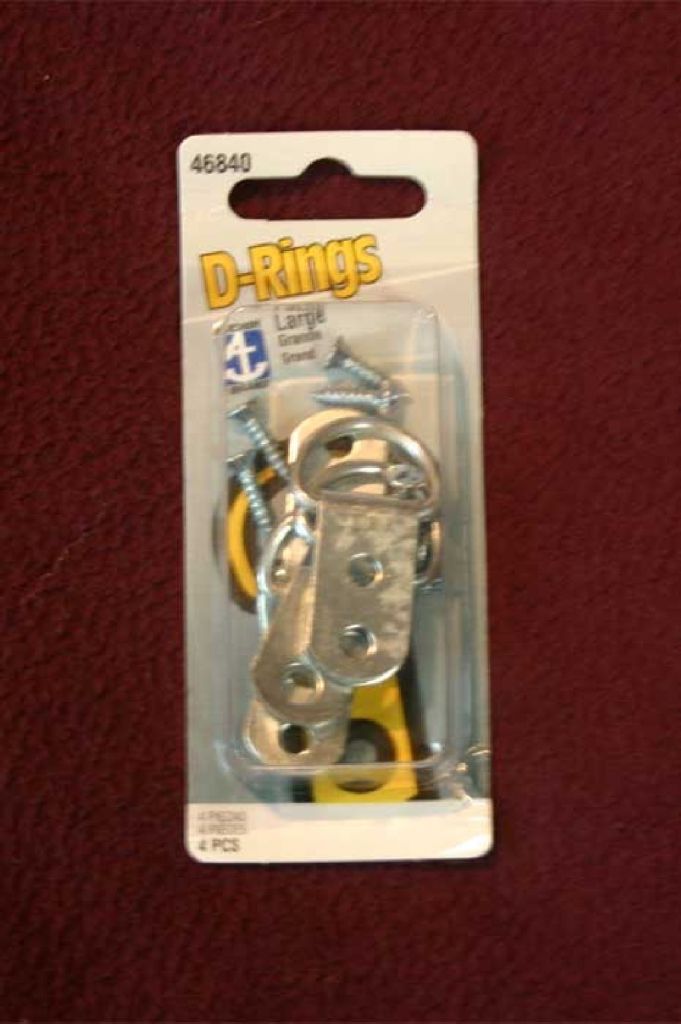
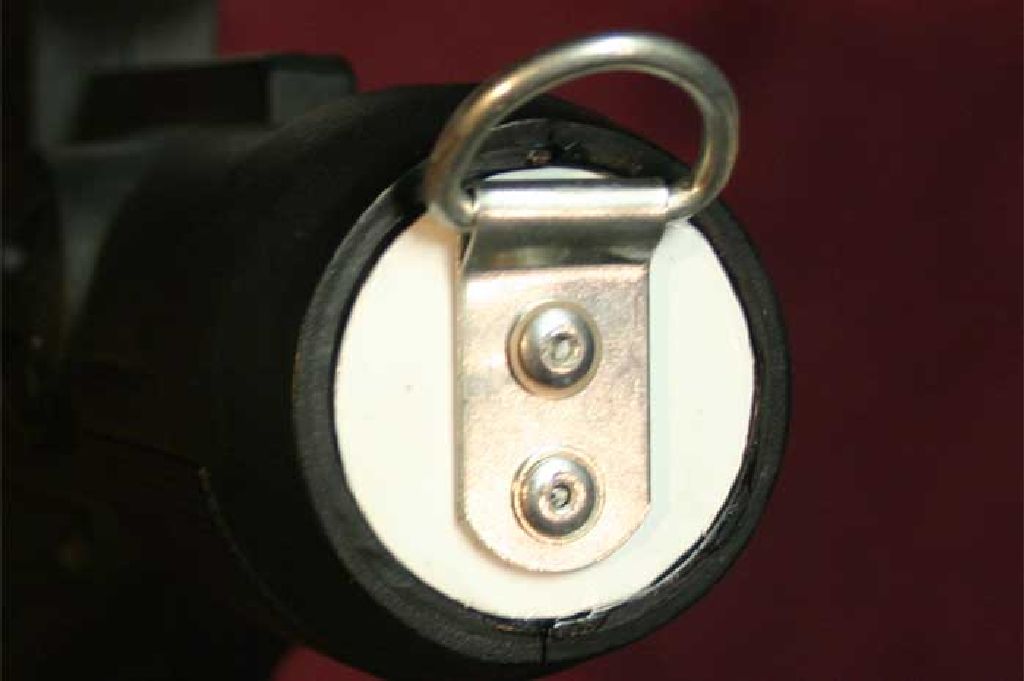
With the wiring done all that was left for the inside was a new rear plate to attach a D-Ring too then everything could be buttoned up. I know a D-Ring isn't accurate but it's better than not having one there.
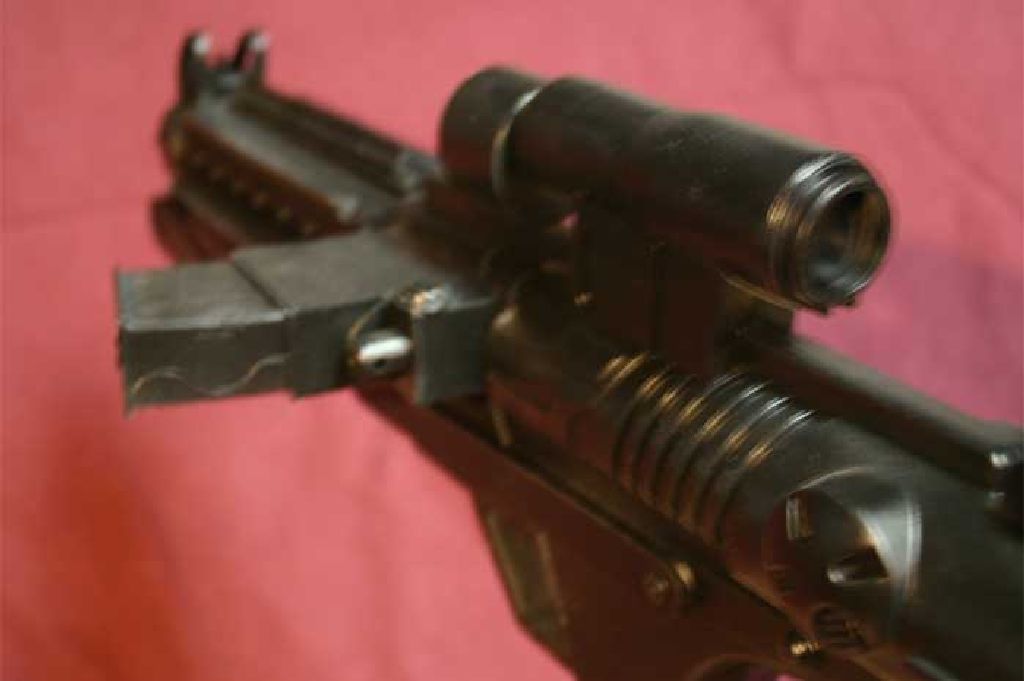
With the halves together I could build the scope. I changed my design slightly as I didn't like the look of the last one. The front ring of the original scope was attached directly to the front of the chopped scope and scrap plastic was used to cover the ends. As before the original scope back and the original muzzle tip were used for the new scope front.

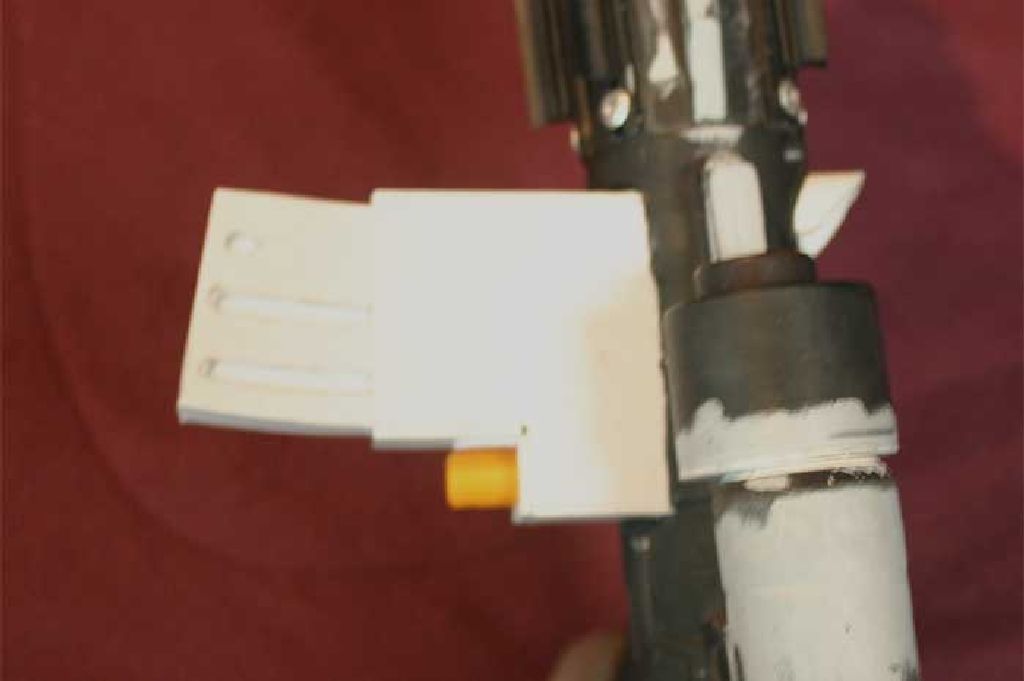
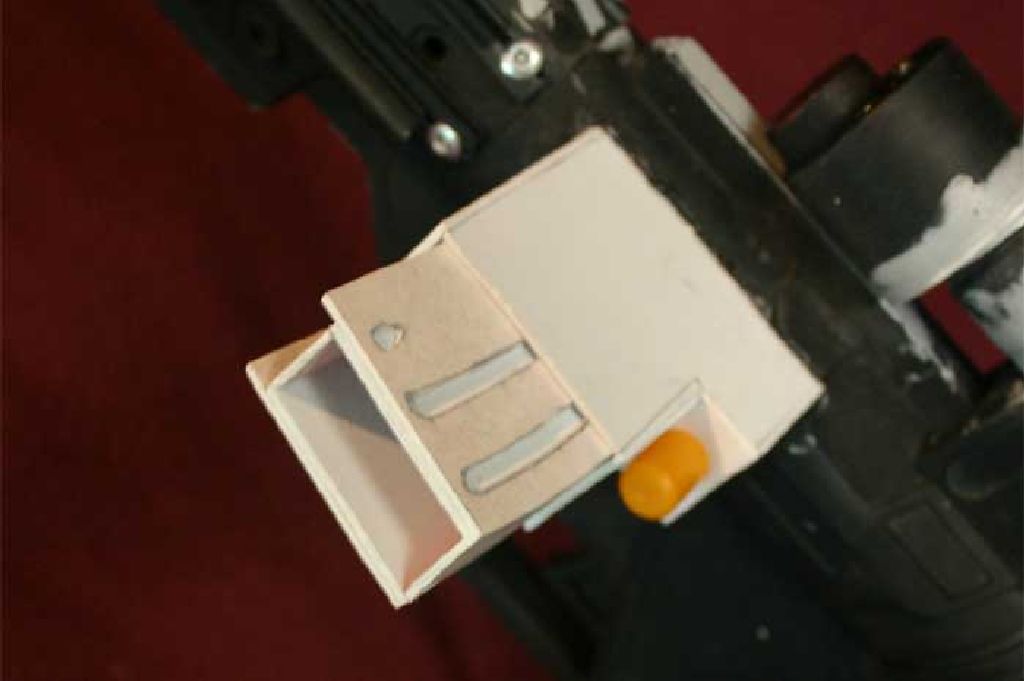
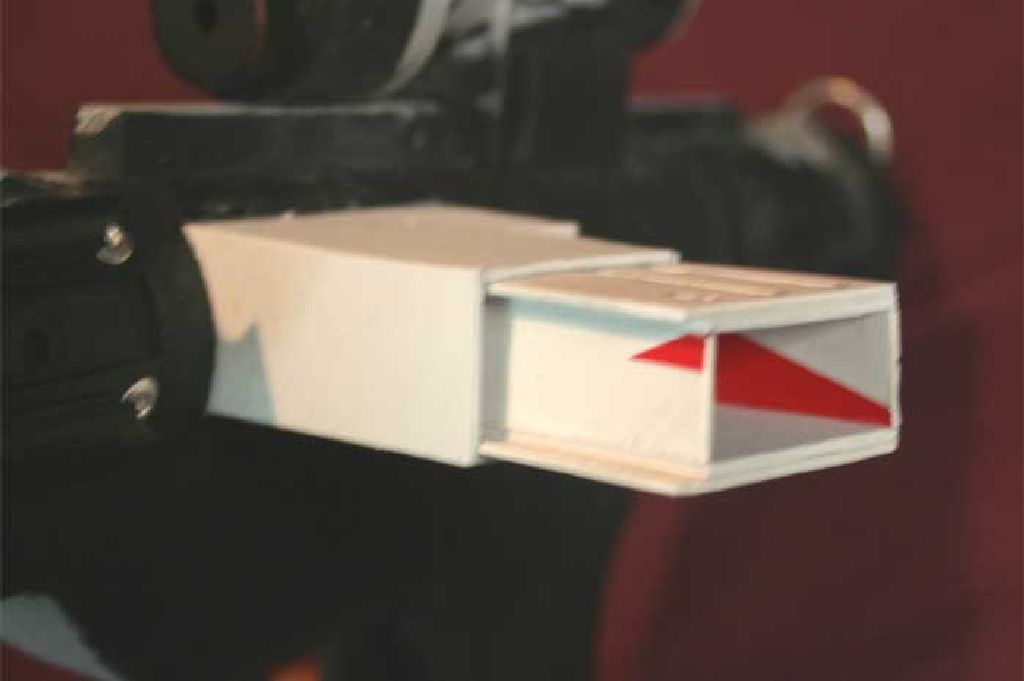
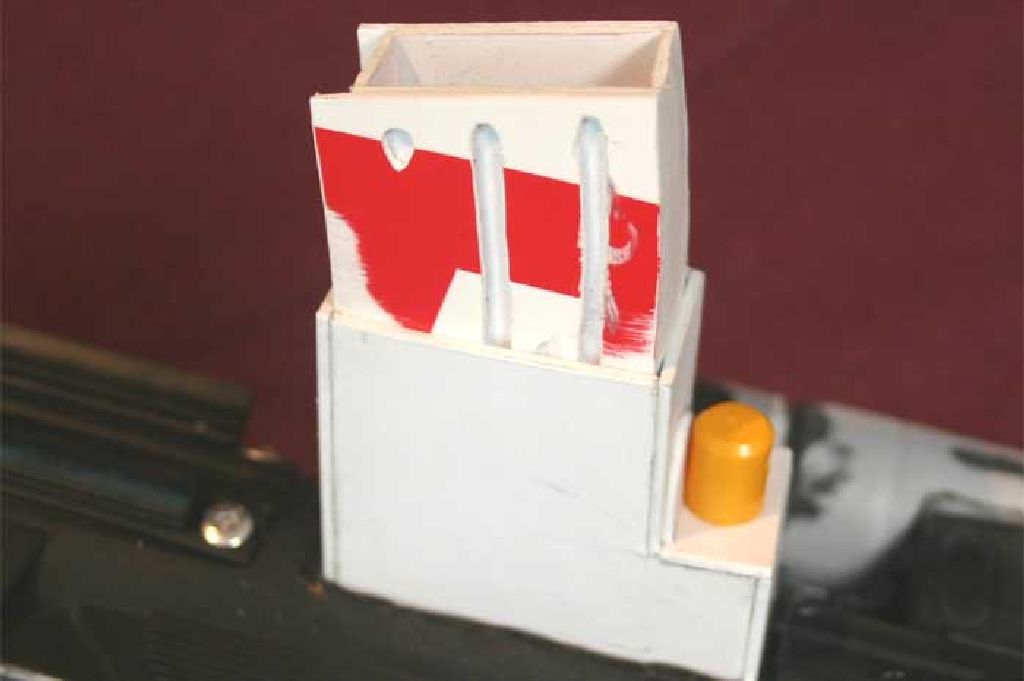
The powerclip was a lot more labor intensive this time. I trimmed out a 1" by 2" rectangle on the side of the blaster. A 2"x2"x1" box with a 1"x.5" section taken out was made as the receiver. Some bits from my bits box were used to dress it up. The box was attached with a slightly forward slant the same as a real sterling.

The powerpack was more or less "eyeballed" to the right shape. Details were taken from reference shots and various thicknesses of plasticard were used. I could probably have left the clip removable but the possibility of breakage or loss wasn't worth it. Technically the power clip could easily be made functional by storing the batteries in it instead of the handle and adding contact plates on the sides but the batteries need to be changed so infrequently that its something I didn't feel like taking the time to do.
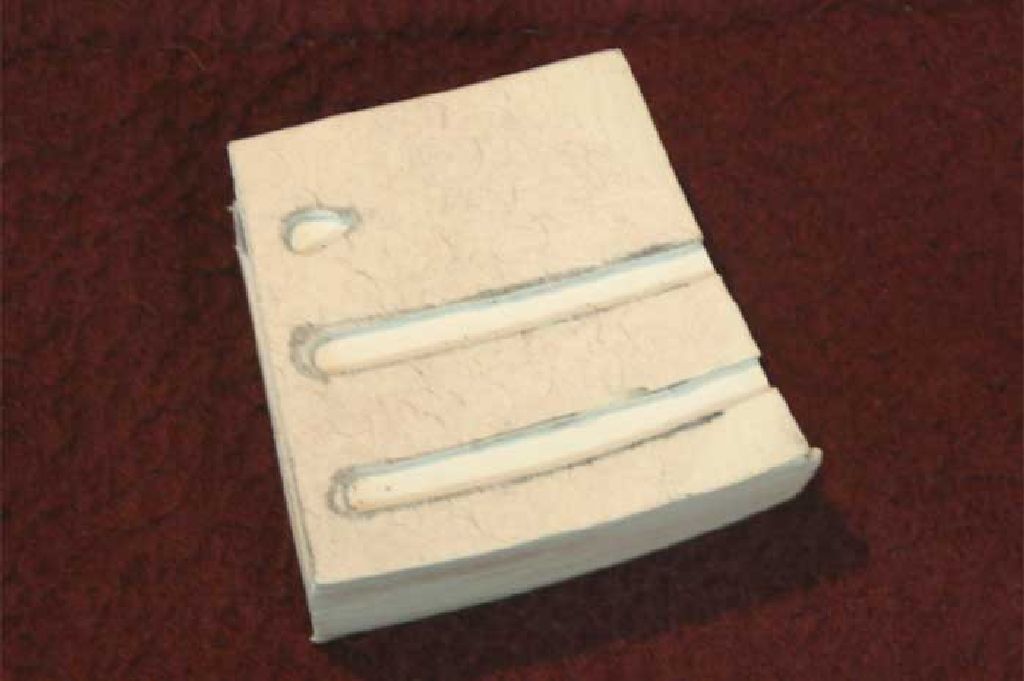
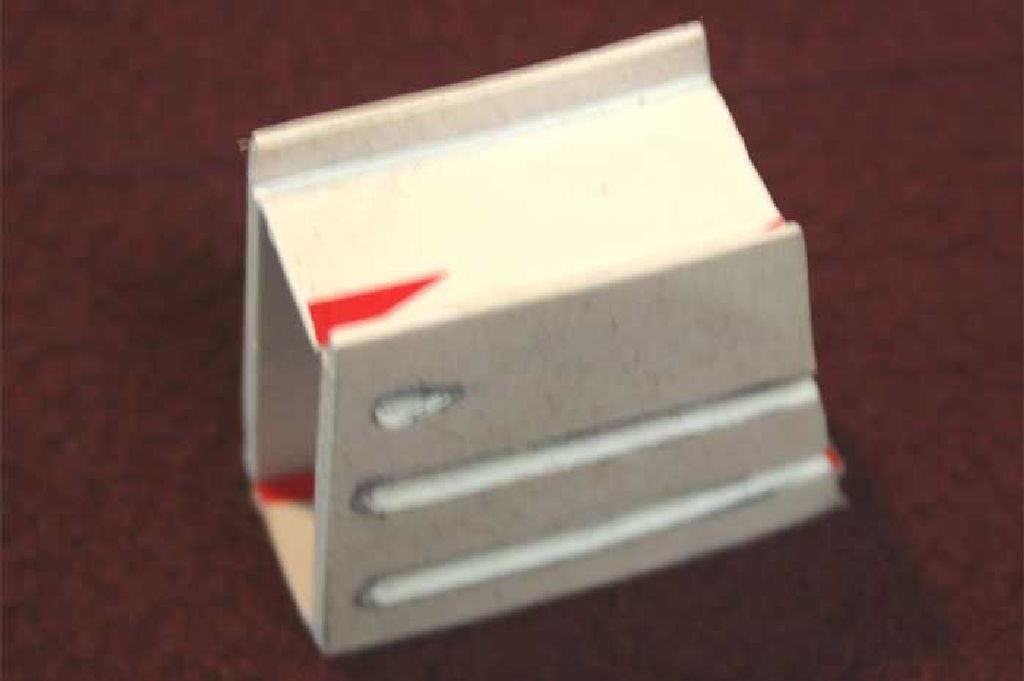
The folding stock was made the same way as the earlier one with a few little details added. The barrel rails were made from windshield wiper blades again with a top blade added this time. The raised plastic rail and sight on the top of the barrel were cut off. An accurate front "sight" was made out of plastic. All the seams were puttied with Tamiya model putty. Unfortunatly this seemed to react to the plastic and melt it so I would recommend using something else like the Milliput I used on the first gun. I managed to smooth the worst spots then plugged the tip with tape before giving the gun a coat of flat black spray followed by a matte clear coat. The tip was painted orange to make it usable in public and at conventions.
Tweet
